Gluten-Free Chocolate & Raspberry Roulade

chocolate and raspberry roulade

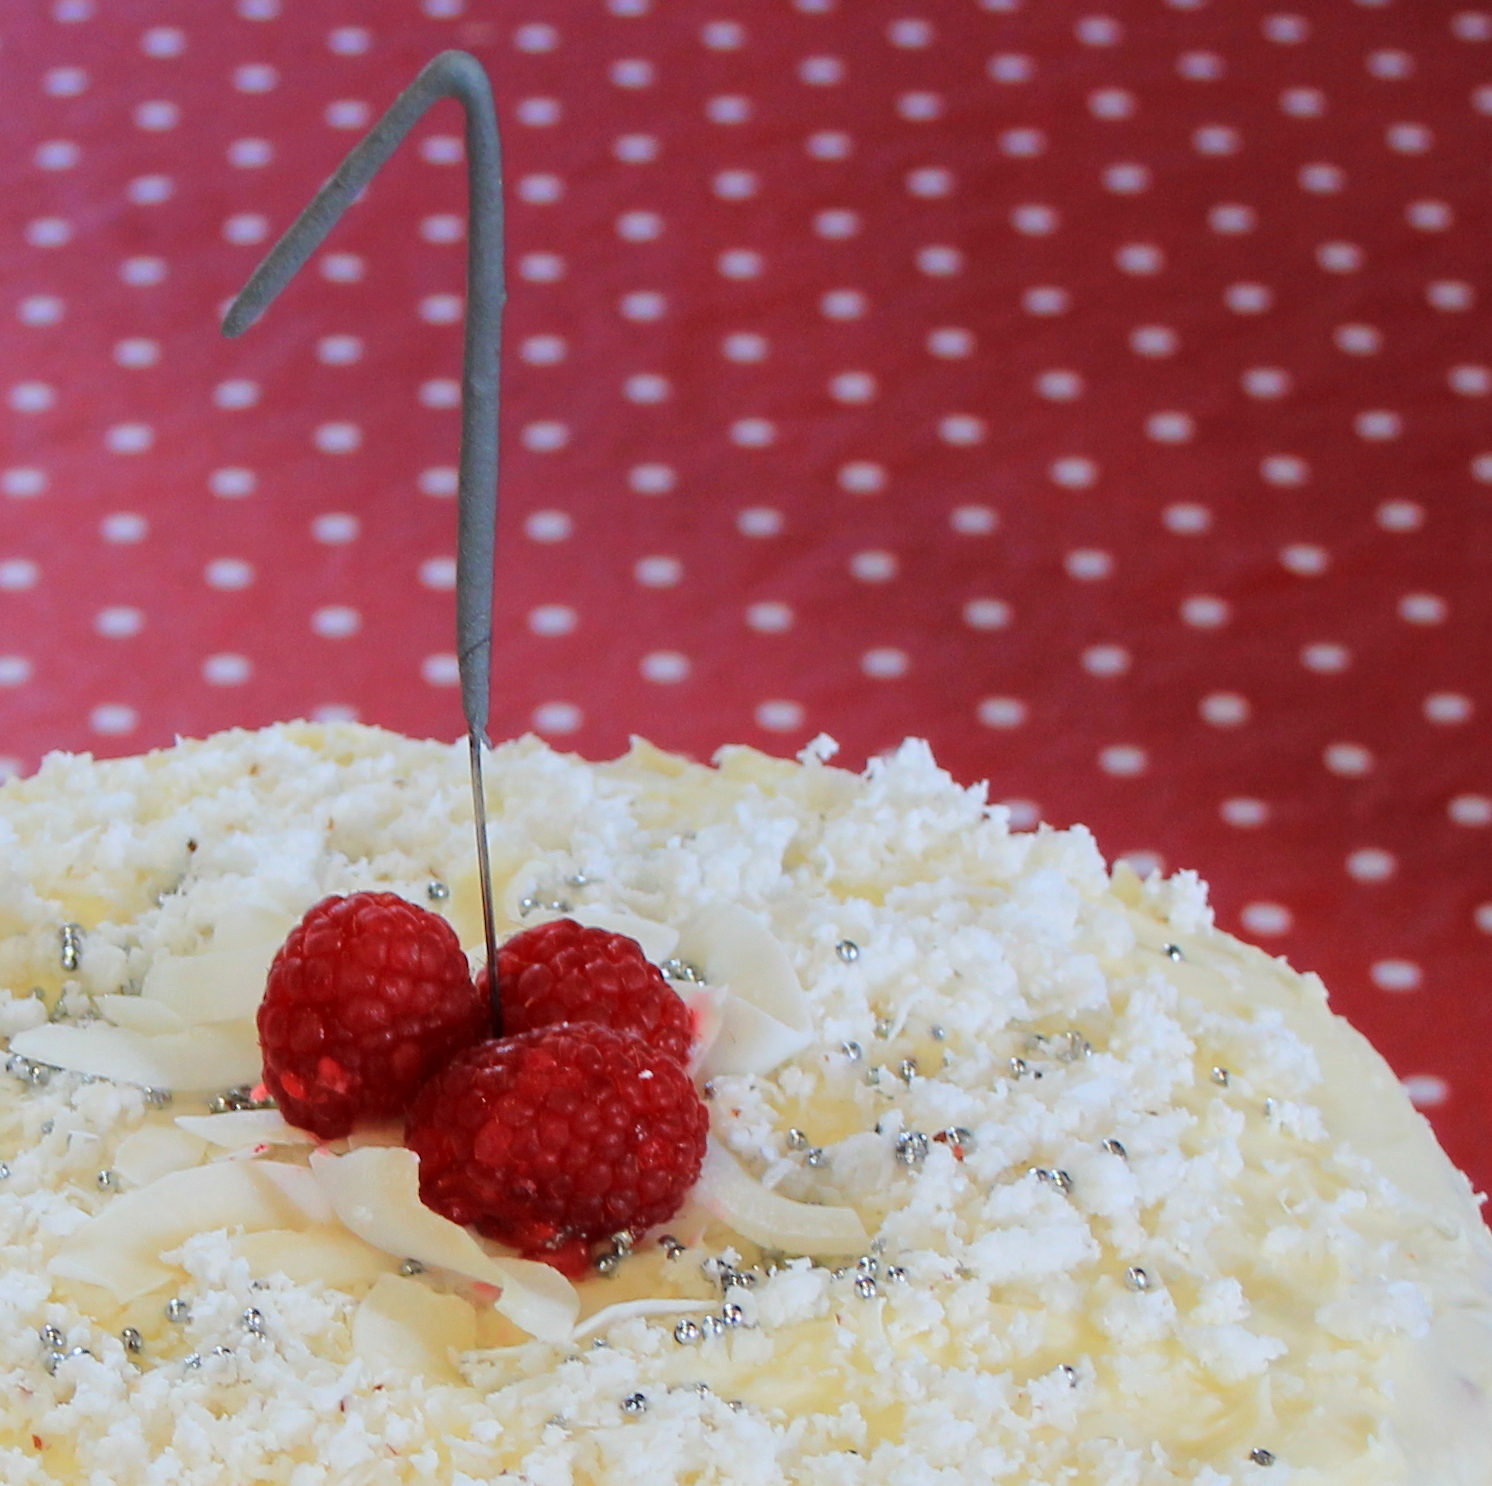
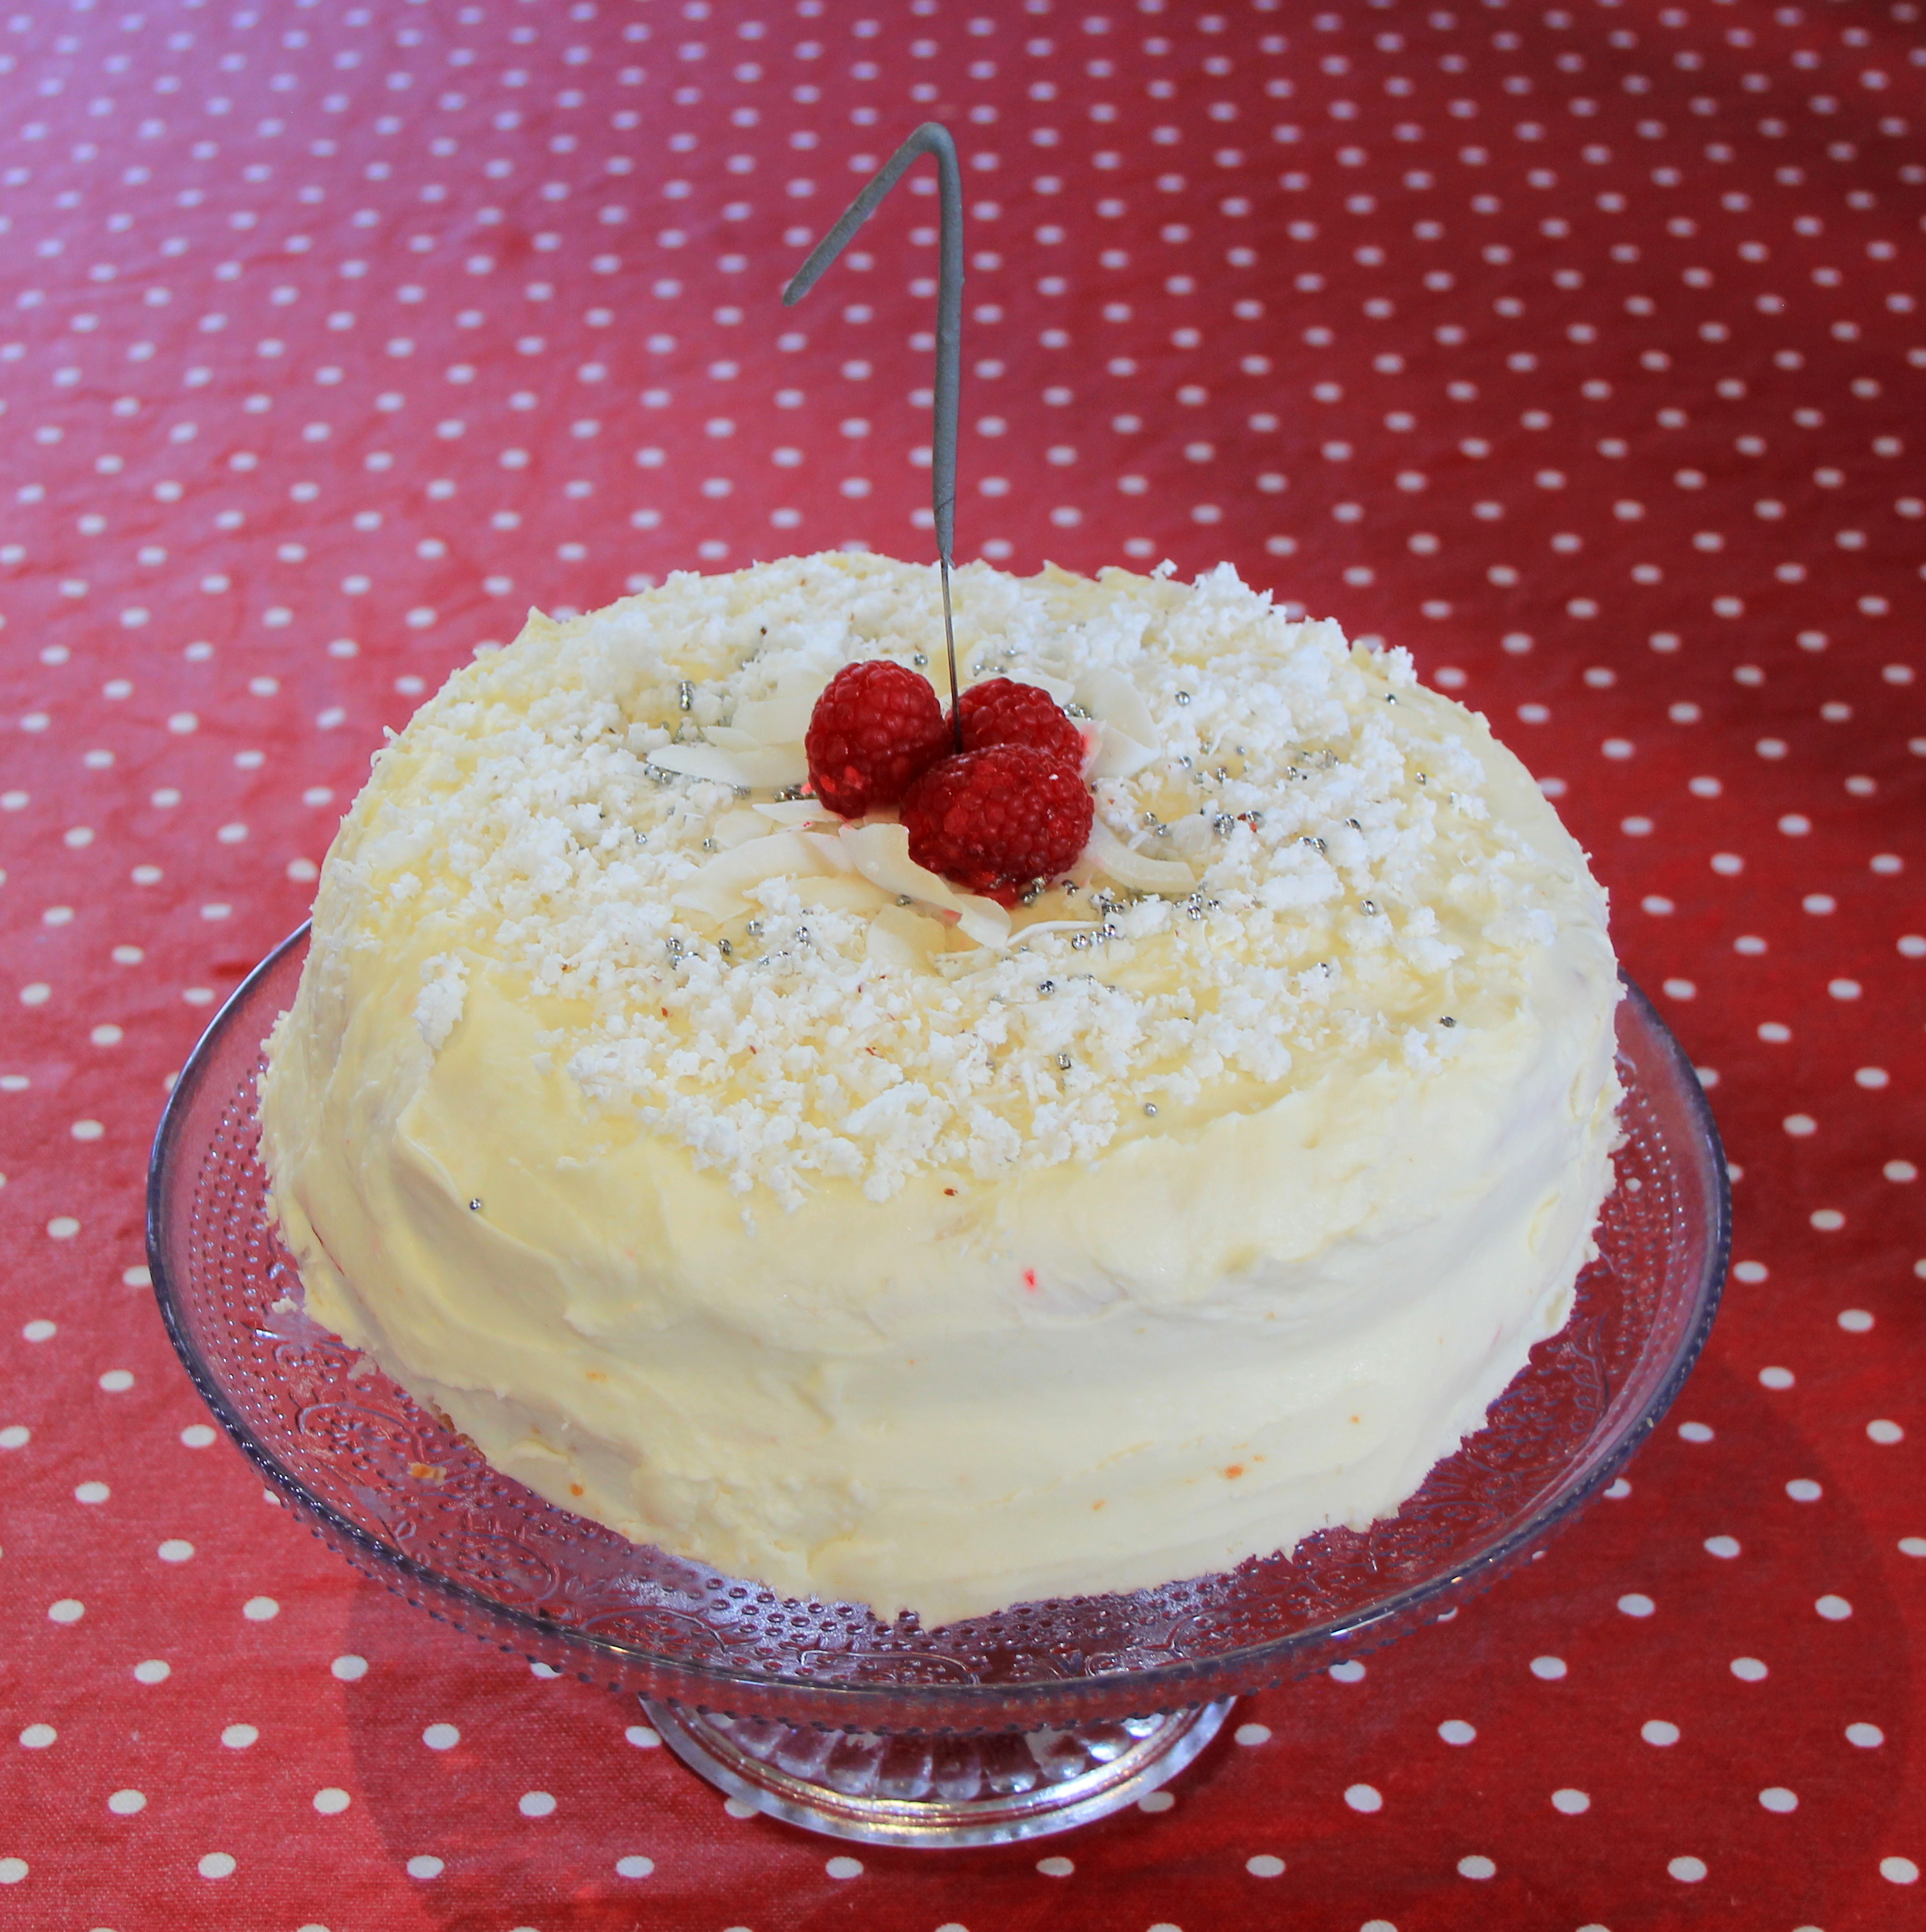
This is definitely not the quickest cake in the world, but I’ve never made a swiss roll or roulade before so it was interesting to give it a go. I learned two things, first, there is no butter or oil in roulade (until you ram it full of cream of course!) – there is chocolate in this one, but you can make it without. Secondly, its really easy. Just not so quick. But that might be me.

Here is how you make it – you will need a 33cm x 23cm (13in x 9in) Swiss roll tin.

Ingredients

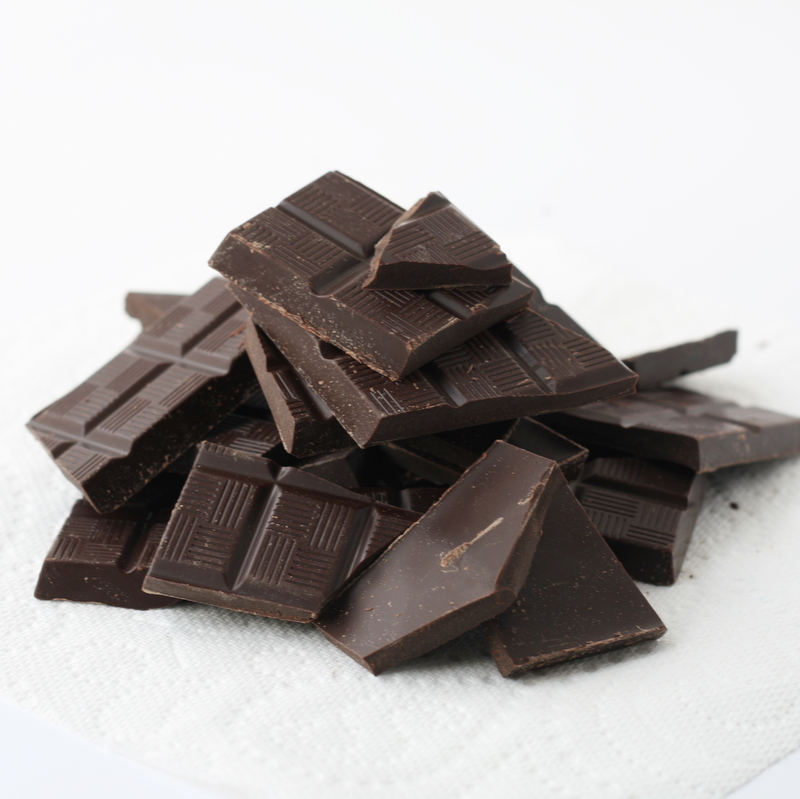
  • 175g/6oz plain chocolate, broken into pieces
  • 175g/6oz caster sugar
  • 6 eggs, separated
  • 2 level tbsp cocoa, sieved

For the filling

  • 300ml/10fl oz double cream
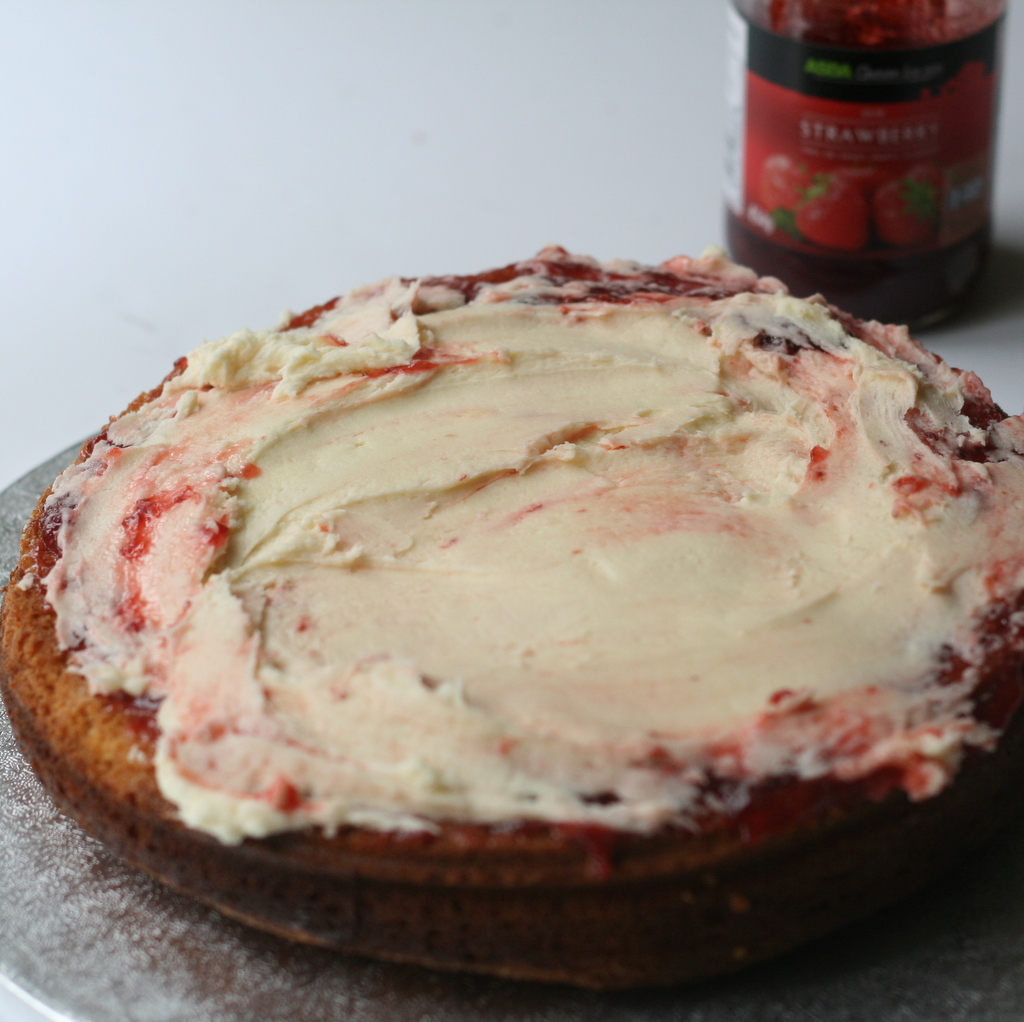
  • 3tbsp raspberry jam

For the Chocolate Sauce:

  • 100g chocolate
  • 200ml double cream

Method

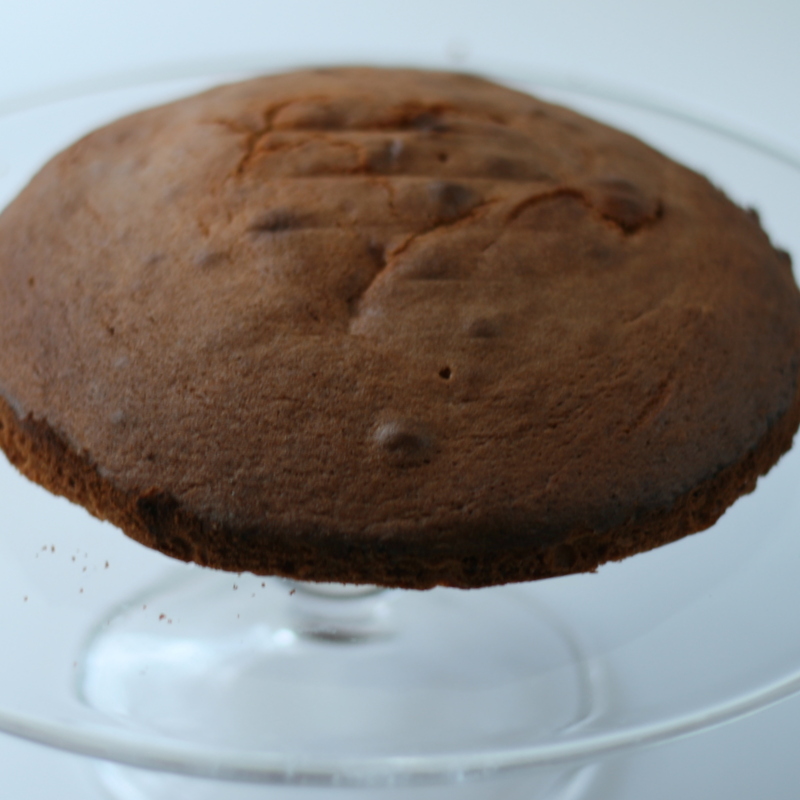
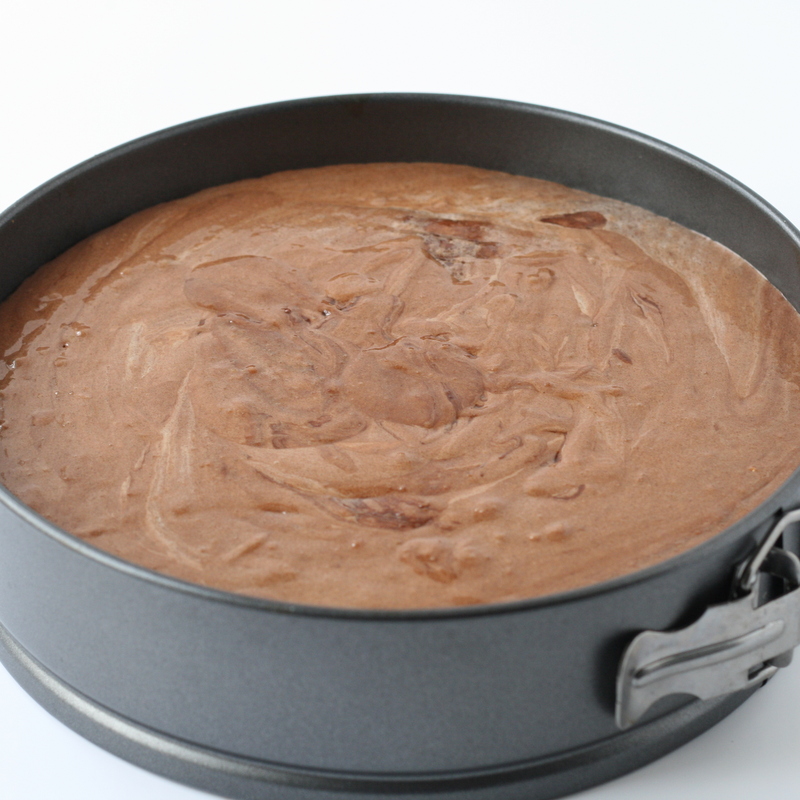
1. Lightly grease the Swiss roll tin and line with baking parchment. Preheat the oven to 180C/350F/Gas 4.

2. Melt the chocolate slowly in a bowl over a pan of hot water. Allow to cool slightly.

3. Place the sugar and egg yolks in a bowl and whisk with an electric whisk until light and creamy. Add the cooled chocolate and stir until evenly blended.

4. Whisk the egg whites in a large mixing bowl until stiff. Stir a large spoonful of the egg whites into the chocolate mixture, then fold in the remaining egg whites and the cocoa.

5. Pour into the prepared tin and give it a wobble to level the top. Bake in the preheated oven for about 20 minutes until firm to the touch. Remove from the oven, leave in the tin to cool for a few minutes, then flip it out onto some cling film. Roll it up, incorporating the cling film as you go. Leave to cool completely. This will help the cake to not crack when wrapped with the cream.

roulade recipe little  button diaries 1

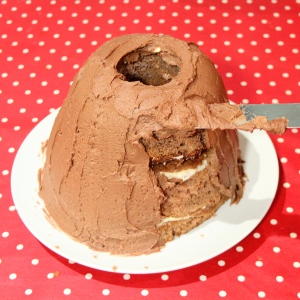
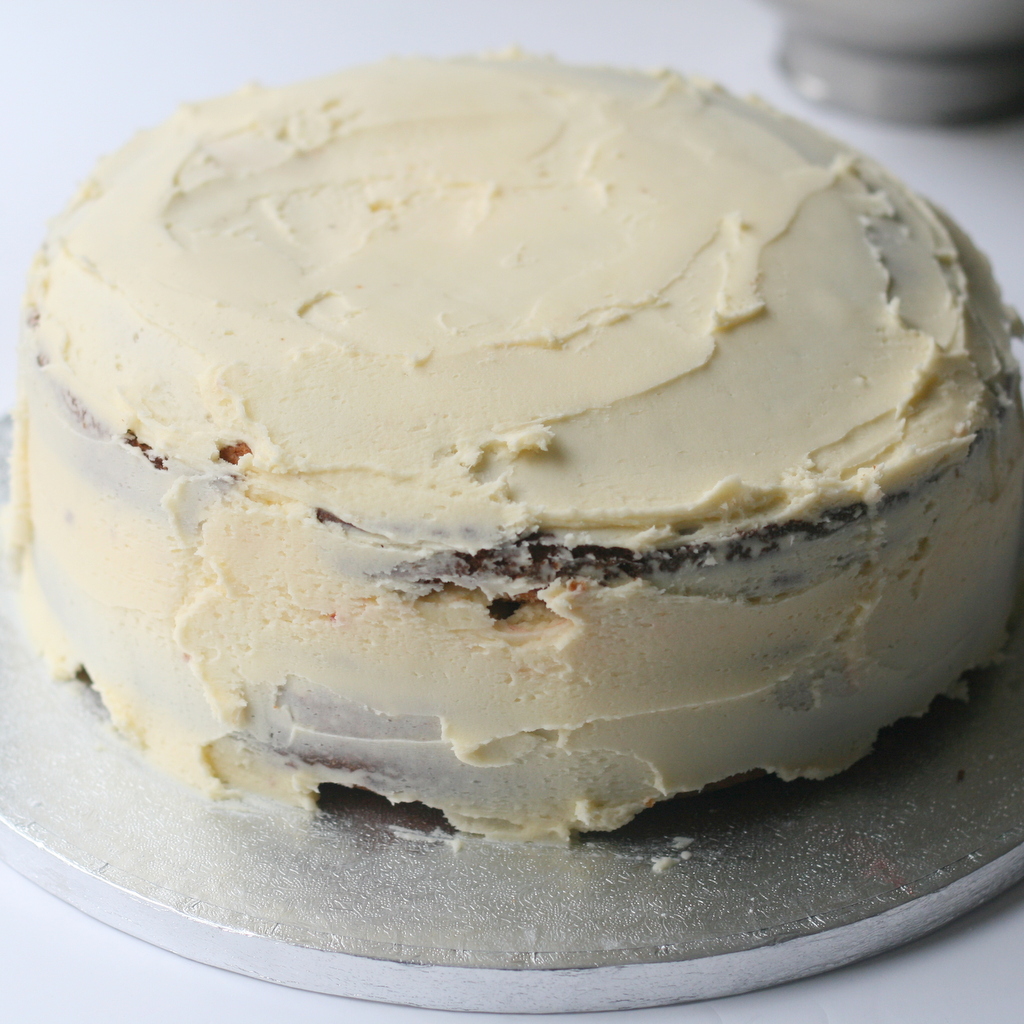
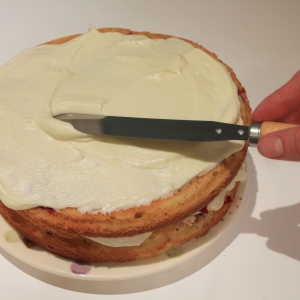
6. meanwhile, whip the cream until it just holds its shape. Once the cake has cooled, unwrap it and spread the jam and cream on top. Roll it back up, this time without the clingfilm!

7. Finally, make the chocolate sauce. This is so easy, simply heat the chocolate in a glass bowl over a pan of barely simmering water. When it starts to melt, add the cream then stir until it has all melted and combined. When you are ready to serve the roulade, pour the sauce on top. Delicious!

roulade recipe little  button diaries 5
roulade recipe little  button diaries 2

Champagne & Gold Leaf Celebration Cake

champagne and gold leaf wedding cake

I recently attended a wedding of two very good friends of ours. Their DIY craft inspired celebration was beautiful. Instead of having one wedding cake, they asked willing guests to each make one, leading to a trestle table FULL of beautiful sweet treats. Deciding what to bake for the occasion was tricky…. I thought champagne and glitz are standard elements of a wedding so I made a champagne and gold leaf celebration cake.

To make the sponges you will need:

  •  200g unsalted butter
  •  200g caster sugar
  •  200g plain flour
  •  4 eggs
  •  2 tbsp baking powder
  •  A few drops of vanilla extract

To make the buttercream you will need:

  •  350g unsalted butter
  •  700g icing sugar
  •  Champagne, or a good quality sparkling wine (6-10 teaspoons)

To decorate:

champagne and gold leaf wedding cake

1. Preheat your oven to 180 degrees. Begin by making your sponges. Cream the butter and sugar together in a bowl. Then add half the eggs and flour and mix. Add the vanilla, baking powder and remaining eggs and flour and combine well. Divide into two sandwich tins and bake for 30 minutes (insert a skewer into the mixture and if it comes out clean it will be ready to remove from the oven).

champagne and gold leaf wedding cake

2. Whilst the cakes are cooling, make the buttercream, Beat the butter until it is light and fluffy. Add the icing sugar and beat until the mixture is combined. Add teaspoons of champagne, one at a time, until you have your desired strength of taste. Then, sandwich the sponges together with buttercream and spread a thin layer around the top and sides as a crumb coat. Place in the fridge to chill.

3. Add a second layer of buttercream and smooth it with a palette knife. Learning how to make cakes super smooth is definitely on my to do list. If anyone has any tips then please let me know!

champagne and gold leaf wedding cake

4. I wanted to keep the decoration really simple for this cake, so I scored the word ‘love’ onto the top using a skewer.

champagne and gold leaf wedding cake

5. The final glitzy touch to the cake is a sprinkling of gold leaf. This can be really fiddly to apply so use a cocktail stick to pick it up and place it into the centre of the heart. When you peel the gold leaf off the sheet, it will shrivel up, so only take it out when you’re ready to place it on the cake.

champagne and gold leaf wedding cake

Many congratulations to the happy couple, and may your lives together be filled with lovely cake!

 ~ Laura xx ~

Frozen Elsa Cake Video Tutorial

frozen elsa cake tutorial from little button diaries

A couple of weeks ago my gorgeous little niece turned 8. Like 99.99% of all 8 year old girls, she loves Frozen. Obviously we had to have a cool little Frozen themed party to celebrate, and OBVIOUSLY we had to have an Elsa cake. This cake is pretty easy to make – the only tricky bit is the pancake flip of the rolled out icing onto the cake. Yikes. It takes a little time, but you have nothing better to do right?

Here is a little video showing you how to make the cake – with full instructions below.

You will Need:

  • 3 cakes (2 made from a 20cm cake tin and 1 from a 1L pudding basin)
  • Butter icing (enough to cover and fill 1 large cake)
  • 1kg pale blue Fondant Icing
  • Icing sugar
  • Sprinkles – Icicles and baubles
  • Pale blue cake dust?
  • 3″ cookie cutter
  • An Elsa doll

1. Begin by placing your base cake on a plate and, using a cookie cutter, cut and discard (read: eat) the centre. Spread buttercream onto the cake and repeat the process with the other two cakes, stacking them up. The buttercream does not need to go to the edge as you will be trimming this away. Now take a bread knife and shape the cake to resemble a dress shape.

 frozen doll cake little button diaries 30 frozen doll cake little button diaries 1

2. Spread buttercream thickly all over the cake.

frozen doll cake little button diaries 3 frozen doll cake little button diaries 4

3. Place a ruler down the centre of the cake to check the height against that of the doll. If it needs to be a little taller, roll a small lump of icing and cut a hole with the cutter, and place this on top.

frozen doll cake little button diaries 5

4. Wrap a tape measure over the cake to work out what size your icing needs to be. Place a couple of sheets of cling film on your work surface, sprinkle with icing and roll it out to about 3mm thick. Now for the scary bit. Gently pick up the clingfilm underneath the icing and quickly place it on top of the cake. EEEEEK! Ease out any folds immediately before they tear the icing. This is a bit of a no-going-back moment!

frozen doll cake little button diaries 6 frozen doll cake little button diaries 7

5. Smooth out the lumps and tease the icing so that the folds resemble a skirt. When you are happy with how it hangs, trim away the loose ends with a sharp knife. Use the cutter to cut a hole through the top of the icing. Wrap clingfilm around the waist and legs of the Elsa doll and insert her into the top of the cake.

frozen doll cake little button diaries 8 frozen doll cake little button diaries 9

6. Cut a strip of icing, about 3″ long, and wrap it around her waist. Cut off the loose ends neatly and smooth in place. Mix a paste by combining a couple of tablespoons of icing sugar with about 1/4 teaspoon of water. Use this paste as a glue to attach the frozen embellishments and decorate the skirt.

frozen doll cake little button diaries 10 frozen doll cake little button diaries 11

Finally, dust the cake with a little pale blue edible glitter for an extra bit of icy shine.

frozen doll cake little button diaries 12

She’s finished! She took a while to make it, but it was very worth it to see the look on Elsa’s (and Elsa, Elsa and Elsa’s) face.

frozen doll cake little button diaries 25 frozen doll cake little button diaries 17 frozen doll cake little button diaries 22 frozen doll cake little button diaries 20

Tia xxx

Peppa Pig Muddy Puddles Cake & Topper

peppa pig birthday cake topper

It was Harper’s 2nd birthday recently, and being a fan of Peppa Pig (which two-year-old isn’t?!) we decided to make her a muddy puddle cake topped with a party Peppa. The inside of the cake was a vanilla sponge with jam and vanilla buttercream. The outside was buttercream and chocolate icing.

You will need:

  • Ingredients for sponge
  • Strawberry jam
  • Vanilla buttercream
  • Ready to roll icing in pink, red, yellow, white and black
  • Chocolate ready to roll icing
  • 3 cocktail sticks
  • Small amount of glittery gold card, glue and a tiny pom-pom

peppa pig birthday cake tutorial

1. Begin by making your sponges.

peppa pig birthday cake tutorial peppa pig birthday cake tutorial

2. Once cooked and cooled, sandwich together with strawberry jam and buttercream.peppa pig birthday cake tutorial

3. Smooth a thin layer of buttercream around the top and sides of the cake to seal the crumbs in place. Place in the fridge to harden a little. Using a palette knife add a second layer of buttercream. Place a generous helping on top of the cake and use your knife to smooth out the top, smoothing it down onto the sides.

peppa pig birthday cake tutorial

4. To make the muddy puddle, mould the brown ready to roll icing in your hand to warm it slightly. Roll to a thickness of about 4mm and then, using a knife, cut out a large puddle shape. This needs to be larger than the top layer of the cake so it can go down the sides. Then cut out different-sized teardrop shapes and press onto the cake to make the splashes.

peppa pig birthday cake tutorial

5. We decided to film making the Peppa topper as it seemed easier to explain than writing the instructions down!

peppa pig birthday cake tutorialpeppa pig birthday cake tutorial

 Harper was filled with delight, and said “Peppa!” when she saw it, so we knew it was worth the effort.

~ Laura & Tia xx ~


Gluten-free Fudgy Almond Cake

gluten free cake

Yesterday I went to a very crafty hen do for my lovely friend Claire. There was lots of craft, tea and a whole table of cakes. Hens were asked to bring baked goodies so I attempted a gluten-free cake (a first for me) so the bride-to-be could enjoy some too! As gluten-free baking is uncharted waters for me, I decided to stick to a professional’s recipe and plucked for Phil Vickery’s because he had me at “fudgy”.

To make the cake you will need: 

  • 200g unsalted butter
  • 200g gluten-free dark chocolate
  • 5 medium eggs, separated
  • Pinch of cream of tartar
  • 240g caster sugar
  • 1tbsp vanilla extract
  • 200g ground almonds
  • 50g chickpea (gram) flour

For the syrup:

  • 100g caster sugar
  • 4tbsp chopped fresh mint

For the frosting:

  • 500g mascarpone
  • 50g honeycomb, chopped
  • 100g clear honey


1. Begin by preheating your oven to 180°C and line your cake tin.

gluten free fudge almond cake recipe

2. Place the butter and chocolate into a bowl and melt over a pan of simmering water.

gluten free fudge almond cake recipe

3. Place the egg whites and cream of tartar in a bowl and whisk until thick and foamy, then add half the sugar, and whisk again until creamy and thick.

gluten free fudge almond cake recipe gluten free fudge almond cake recipegluten free fudge almond cake recipe

4. Add the rest of the sugar and whisk until very stiff, and with a creamy consistency. Stir the egg yolks, vanilla extract, almonds and chickpea flour into the warm chocolate and butter, then add half the meringue, mixing well. Finally, add the rest of the meringue and fold in.

5. Spoon into the lined tin and bake for 45-50 mins, or until firm.gluten free fudge almond cake recipe

6. Remove from the oven and cool slightly in the tin. Make several holes over the surface of the cake with a skewer.

gluten free fudge almond cake recipe gluten free fudge almond cake recipe

7. Meanwhile, place the sugar, 100ml water and the mint in a small pan and boil until the sugar has dissolved, then strain. Spoon the syrup over the cake and leave to soak in and cool completely.

gluten free fudge almond cake recipe gluten free fudge almond cake recipe

8. Once the cake has cooled, beat the mascarpone, honeycomb and honey together with a wooden spoon.

gluten free fudge almond cake recipe

9. Turn out the cake. As there is no gluten in the cake, it will have quite a soft texture, so be careful. Cover the cake with the honey mascarpone.

This recipe is taken from Seriously Good! Gluten-free Cooking by Phil Vickery.

  gluten free fudge almond cake recipe gluten free fudge almond cake recipegluten free fudgy almond cake

If you like our blog, we would love you forever if you could take a tiny two seconds to nominate us for the Best Craft Blog at the 2015 BIB awards… click below to vote. Thank you!

craft bibs 2015

~ Laura xx ~

Peek-a-Boo Carrot Cupcakes

carrot   IMG_8035 IMG_8037

My father-in-law is a keen gardener and has an impressive array of vegetables growing in his garden. I created these peek-a-boo cupcakes for his birthday as a nod to his green fingers.

To make 12 cupcakes you will need:

For the sponge:

  • 250g unsalted butter
  • 250g caster sugar
  • 250g self-raising flour (sifted)
  • 4 eggs
  • 2 teaspoons of baking powder
  • Orange food colouring gel
  • Cocoa powder

For the ganache:

  • 450g dark chocolate
  • 200g unsalted butter

For the topping:

  • Grated dark chocolate
  • Ready to roll green icing

1. Begin by preheating the oven to 180 degrees. Cream the butter and sugar together. Add the eggs and combine. Fold in the flour and baking powder until fully mixed.

IMG_7947

2. Line a baking sheet. Take a quarter of the mixture and scoop into a separate bowl. Add the orange food colouring and stir until the mixture is bright orange.

IMG_7950

3. Spoon onto the baking tray and smooth using a palette knife. Cook for approximately 8-10 minutes or until done. Leave to cool.

IMG_7977

4. Once cooled, cut into triangles so they resemble carrots. They need to be the length of the cupcake case, and you need two per cake. Place on a lined baking tray and pop in the freezer to harden a little.

carrot carrot

5. Add the cocoa powder to the remaining cake mixture and mix until combined. Half fill the cupcake cases. Remove the carrots from the freezer and place two back to back in the centre of the cupcake. Cover the carrots with the remaining cake mixture. Place in oven for 20 minutes or until cooked. Transfer to wire cooking rack and leave to cool.

IMG_7981 IMG_7982

6. Whilst the cakes are cooling make the soil and leaves. For the soil, grate dark chocolate. For the leaves, roll the icing out to 0.5cm in thickness. Using a sharp knife, cut out leaf shapes and add small details onto the top of the leaves.

IMG_7988 carrot cake

7. Next, make the ganache. Melt chocolate then add butter and stir until melted. Once the ganache has cooled (but isn’t set) pour on top of the cakes.

IMG_8040

8. Sprinkle the grated chocolate on top so it resembles soil and arrange the leaves in the centre of the cake.

IMG_8045

These would also look great on your Easter table.

~ Laura xx ~

Coconut & Raspberry Cake

coconut and raspberry cake little button diaries 7

My littlest button, Lilah, turned into a 1-year-old last week. Insert boring clichés about how time has flew (it really has) and how I’ve loved every minute of her little life so far (night times not so much. She’s nocturnal). Anyway, I had the family coming round to celebrate so I thought I’d make a nice cake. I went for a recipe I found in Peyton & Byrne’s fabulous British Baking Book – it is a recipe for cupcakes so I doubled it, extended the cooking time and added fresh coconut and jam.

Ingredients:

  • 200g softened unsalted butter
  • 250g caster sugar
  • 300g self raising flour
  • 4 eggs
  • 120g low fat natural yoghurt
  • 400g raspberries
  • 60g desiccated coconut
  • 4 tbsp raspberry jam

For the icing:

  • 230g caster sugar
  • 350g unsalted butter, softened
  • 4 egg whites
  • 100ml coconut milk, shaken
  • fresh grated coconut to decorate (about 1/3 coconut), or dessicated*

Method

1. preheat the oven to 170 degrees and line 2 x 20cm cake tins with baking parchment. As a brief tangent… I recently discovered how to line a tin A LOT quicker. So I’m sharing it, in case you don’t know yourself. All you do is fold up a piece of parchment bigger than the tin (fold in half, in half again, then in half again on the diagonal to get a triangle). Cut the triangle so that it is half the diameter of the tin, roughly. When you open it up you will have a tin sized circle! Okay, back to the recipe…

 coconut and raspberry cake little button diaries coconut and raspberry cake little button diaries 1

2. Cream together the butter and caster sugar, then add the eggs, one at a time, mixing well after each addition. Sieve in the flour and add the yoghurt and desiccated coconut, then lightly mix.

3. Drop a dozen raspberries into each tin, then distribute the mixture between the two tins. Bake for around 25 minutes, or until golden brown and springy.

coconut and raspberry cake little button diaries 2

4. To make the icing, put the sugar and egg whites into a heatproof bowl over a saucepan of barely simmering water. Heat until the granules have dissolved into a thickened syrup, about 10 minutes. When the mixture has cooled, beat for about 10 minutes until it forms soft peaks. Add the butter, bit by bit, mixing well.

5. Put about a third of the icing on the top of one of the cakes, then gently spread the jam over the top. Put the other cake on top and cover the entire thing with the rest of the icing.

coconut and raspberry cake little button diaries 4 coconut and raspberry cake little button diaries 5

6. Grate the coconut, if you are using fresh (massively regretted this), see below*. Sprinkle on top of the cake and decorate with a few extra raspberries.

coconut and raspberry cake little button diaries 6 coconut and raspberry cake little button diaries 9

The coconut in the cake mix gives it a lovely moist texture (ugh, moist). Yummy. Look how happy she is with it. Or maybe that was the sparkler!

Tia x

sparkler 1

*on the fresh coconut… In my opinion, life is too short to smash, peel and grate a coconut. It was Delia’s idea, she said it would be easy. Coconut is hard to smash open, I cut my finger trying to prize it out the shell, and it does NOT grate easily. It took me about an hour and I was cursing Delia all night. I missed the Sewing Bee and it put me in a very bad mood!

coconut and raspberry cake little button diaries 8 coconut and raspberry cake little button diaries 11coconut and raspberry cake little button diaries 10

Kinder Bueno Cupcakes

kinder bueno cupcakesIt was Tia’s birthday recently and knowing her love of Kinder Bueno I made her these little gems. The sponge is packed with Kinder chocolate chunks and the buttercream is flavoured with hazelnut. In the words of my Little Button: de-lic-ious!

To make 12 cupcakes you will need:

Sponge:

  • 350g plain flour
  • 1 tsp baking powder
  • 100g butter
  • 200g caster sugar
  • 3 eggs
  • vanilla extract
  • 175ml milk
  • 4 Kinder chocolate bars, chopped

Hazelnut buttercream:

  • 175g unsalted butter, softened
  • 250g icing sugar
  • 2 tbsp milk
  • 3 tbsp Nutella

Topping:

  • 2 Kinder Buenos
  • 100g dark chocolate

kinder buneo cupcakes

1. Begin by preheating your oven to 180 degrees.  Then, cream the butter and sugar together.

kinder buneo cupcakes

2. Add the eggs and combine. Next, fold in the sifted flour and baking powder to the mixture.

kinder buneo cupcakes

3. Chop the Kinder chocolate into chunks and stir into the cake mixture. At this stage a lot of the Kinder chocolate didn’t quite make it into the sponge!

kinder buneo cupcakes

4. Separate the mixture into cupcake cases and fill them so they are three-quarters full.

kinder buneo cupcakes

5. Bake for 2o minutes or until the cakes are cooked. Remove the cakes from the oven and leave to cool.

kinder buneo cupcakes

6. To make the buttercream, beat the butter until it’s light and fluffy. I did this for about 10 minutes.  Add the icing sugar and mix until combined. Then, add the milk and Nutella to the mixture and mix until the buttercream is a consistent light-brown colour.

IMG_8961

7. Pipe or spread the buttercream onto the cooled cupcakes.

kinder buneo cupcakes
8. Melt the dark chocolate and pour into a piping bag. Pipe in lines over the cupcakes to resemble the top of the Kinder Bueno. This doesn’t have to be precise.

kinder buneo cupcakes kinder buneo cupcakes

 9. Finally,  break the Kinder Bueno into pieces and stick into the top of the cakes.

kinder buneo cupcakes

These turned out to be really creamy and light cupcakes and a real treat!

~ Laura xx ~

Last Minute Valentines Nutella Pie Pops!

nutella pie pops little button diaries

In my obsessive middle-of-the-night pinning (pinterest is the only thing that keeps me awake whilst breast-feeding at 3am!)  I’ve recently seen several pins featuring Pie Pops. Oh yes! Move over cake –  PIE is now in lolly form. These little chocolatey hearts are perfect for Valentines – they’re super easy and only have three ingredients…if you use ready roll pastry. Okay, that may be cheating, but I have two kids. Its all about speed.

You will need (makes 9 pops):

  • 250g ready-roll shortcrust pastry
  • Nutella
  • 1 egg
  • heart cookie cutter
  • lollipop sticks

Method:

1. Preheat the oven to 200 c. Dust a clean surface with flour and roll out the pastry to about 3mm thickness. From the pastry cut out heart shapes with a cookie cutter.

pie pops 7 pie pops 8

3. Dollop a teaspoon of nutella into the centre of half the hearts. Then mix the egg in a small bowl and use a pastry brush to brush a little egg around the nutella.

pie pops 9

4. Place the remaining hearts on top and press around the edges with a fork. Mark a cross on the top with a knife (to let the air bubbles out and stop your hearts exploding!).

pie pops 10 pie pops 11

5. Brush the egg wash over the top of the pies and pop the pops in the oven for about 15 minutes, or until golden. Once cooked, insert a lollipop stick and leave on a rack to cool.

pie pops 12 pie pops

Now eat your heart out. Ha! I did a joke!

Tia x

pie pops 3 pie pops 4 pie pops 2 pie pops 5

Mint Choc Chip Dinosaur Cake

mint choc chip dinosaur birthday cake recipe

I decided to make my Dad this birthday cake a while back and wanted to decorate it with dinosaurs as a cheeky nod to his age (but it would also work equally well for dino-mad kids). The sponge recipe is from Lorraine Pascale’s Fast, Fresh and Easy Food book, and it’s topped with mint choc chip buttercream and prehistoric mint rubble.

To make this cake you will need:

For the sponge:

  • 150g soft butter
  • 250g caster sugar
  • 150g self-raising flour
  • 125g sour cream
  • 4 medium eggs
  • 50g cocoa powder
  • 1 tsp baking powder
  • couple drops of vanilla extract

For the buttercream:

  • 175g butter
  • 350g icing sugar
  • 6 drops spearmint flavouring
  • Green food colouring (enough to colour it mint coloured)
  • 1 packet plain chocolate chips
  • 2 tbsp milk

For the decoration:

  • Mint creams
  • Mint leaves
  • Dark chocolate to coat leaves
  • Plastic dinosaurs!

mint choc chip cake recipe

1. Begin by preheating your oven to 180 degrees. This recipe is really great as it’s an all in one mix. Put all the sponge ingredients into a mixer and mix until well combined. Next, divide the mixture between 2 sandwich tins and bake for 25-30 minutes or until golden brown. Transfer to a wire cooling rack.

mint choc chip cake recipe

2. Whilst the cakes are cooling, make the buttercream. Beat the butter in a mixer until light and fluffy. Add the sifted icing sugar, milk and spearmint flavouring and mix until well combined. Add enough green food colouring to turn the whole mixture a mint colour (do this by adding it in a drop at a time). Fold in the chocolate chips. Once the cakes are cooled add a layer of buttercream and sandwich them together. Then using a palette knife, cover the top and sides with the remaining buttercream.

 mint choc chip cake recipe mint choc chip cake recipe

3. To make the mint leaves, melt the dark chocolate. Using a teaspoon coat the leaves with a thin layer of the chocolate and put them in the fridge to set. Once they are firm, gently peel the mint leaf away from the chocolate. You will be left with the imprint of the leaves on the chocolate.

mint choc chip cake recipe mint choc chip cake

4. To decorate, roughly chop the mint creams and arrange in the centre of the cake. Then place the leaves between the mint creams to form a Jurassic Park-style landscape. Add your dinosaurs… and present to the dinosaur in your life!

mint choc chip cake

mint choc chip cake recipemint choc chip cake recipe

 ~ Laura xx ~