How to Turn your Toddler into a Pirate

PIRATE CRAFTS

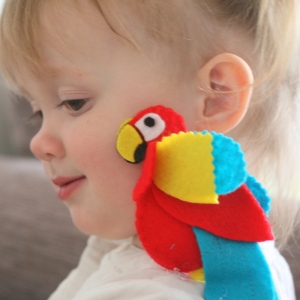
Arrrrrrrr! Coming up with costumes for parties can be tricky. We were invited to a pirate party at the weekend and instead of buying a costume I decided to make a few pirate accessories to transform my Little Button into a little scallywag. After grabbing a white top and black leggings from her wardrobe I added a length of stripy fabric around her middle, and made a felt parrot, cardboard telescope and duct tape pirate boots. For my Littlest Button I made some fabric parrot wings. Who’s a pretty boy then!

Felt Parrot

For this project you will need:

  • One sheet of felt in red, yellow & blue
  • Scrap pieces of felt in black & white
  •  Toy Stuffing
  • Glue and red thread

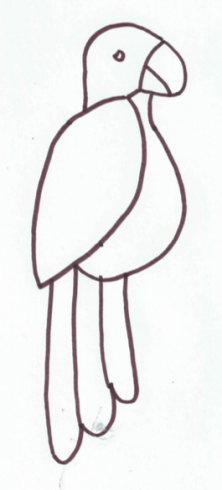
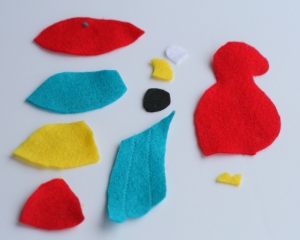
parrot templatepirate crafts1. Begin by cutting out your pieces from the felt. You need two of each – one for each side of the parrot.
pirate crafts

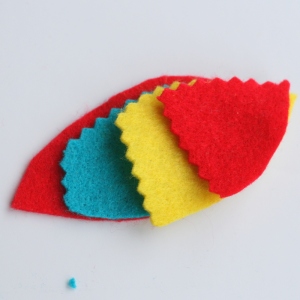
2. To make the wings cut one in red as per the template. Then cut another in blue, one third smaller, and trim the bottom and side with pinking shears. Repeat with yellow and red pieces as per the picture. Stitch or glue together at the top.

pirate crafts3. Glue your parrots together so they are mirror images of each other.

 pirate crafts pirate crafts

4. Cut a belly piece (as above) and sew the two body pieces together using blanket stitch.

pirate craftspirate crafts

pirate crafts pirate crafts

5. Use a safety pin or a few stitches to attach to the shoulder of a piratey looking top.

Cardboard Telescope

For this project you will need:

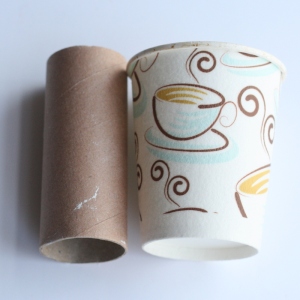
  • Cardboard tube
  • Paper cup
  • Gold paint
  • Masking tape & doubled sided tape
  • Black and gold card
  •  Pirate stickers


pirate crafts pirate crafts

1. Draw around your cardboard tube on the base of your cup. Cut it out.

pirate crafts pirate crafts

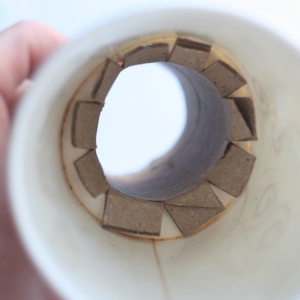
2. Make centimetre-long snips around the bottom of the tube. Push the tube into the hole in the bottom of the cup. Bend back the snips and secure with masking tape.

pirate craftspirate crafts

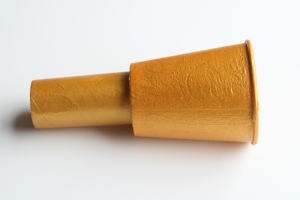
3.Paint your telescope gold by applying several coats.

pirate crafts

4. Decorate with black and gold cards and pirate stickers.

Duct Tape Boots

 For this project you will need:

  • Welly boots
  • Black duct tape

pirate crafts pirate crafts

1. Very simply, wrap strips of duct tape around your wellies! This is a brilliant way of jazzing up boots as the tape can be removed without marking afterwards.

Finally, if you have a baby in need of a pirate-related costume then these parrot wings are simple to make (even though it can take a while to cut out all the wing pieces) and they are easy to sew. For our full tutorial click here.

pirate crafts

IMG_4138  pirate crafts

If you like our blog, we would love you forever if you could take a tiny two seconds to nominate us for the Best Craft Blog at the 2015 BIB awards… click below on the picture to vote. Scroll to section 12 on the form and select us. Thank you!

craft bibs 2015

 ~ Laura xx ~

Make a Toddler Booster Seat

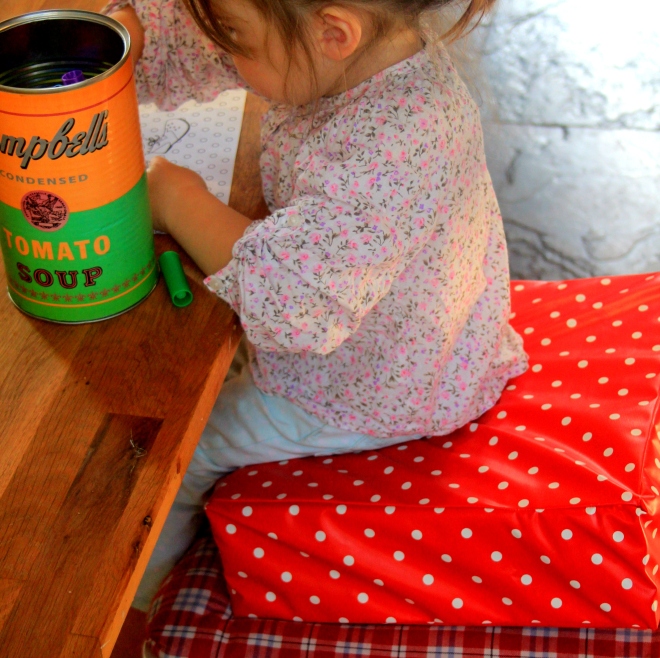
booster chair tutorial little button diariesMy little girl is in a sort of no-man’s land at the moment when it comes to sitting at the table. She’s too big for a high chair, but she’s too small for a chair. I thought about buying a booster chair – I haven’t seen any in the shops but I’m sure you can get them. Then I realised that all you really need is a bit of foam. And its easy to cover a bit of foam! You can buy upholstery foam from EBay, its really cheap and readily available. So that’s what I did. And here’s how I did it.
Materials:

  • 1 metre of oilcloth or PVC
  • Superglue
  • Upholstery foam cushion 12x12x5″

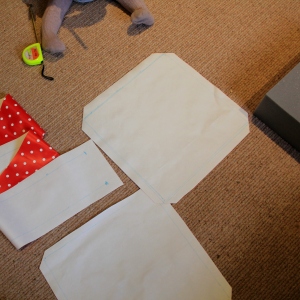
1. cut the fabric as follows:
2 x squares measuring 14 x 14″
1 x strip measuring 50 x 7″

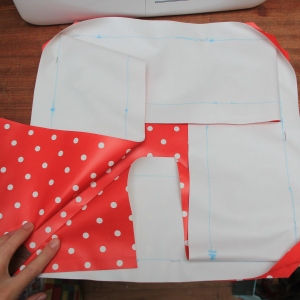
2. Draw a 12×12 square in the centre of each large piece of fabric and a mark a strip 5″ wide on the length of fabric. This will show you where to pin and sew. Snip the corners off each square.

booster chair little button diaries 2

3. Fold over the end of each strip and sew.

booster chair little button diaries 4

4. Pin the strip along an edge of one of the squares, right sides together, matching up the pen lines.

booster chair little button diaries

5. Fold the strip around the corners to line up with the next edge and pin. Continue all the way around. Snip off the edges on the stip to match up with the square.

 booster chair little button diaries 3 booster chair little button diaries 7

6. Sew all the way along this line (including over the ends of the strip)

booster chair little button diaries 11 booster chair little button diaries 9

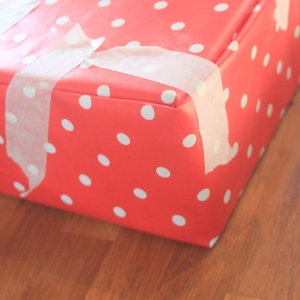
 Place the foam cushion inside the fabric and put the remaining fabric square on top. Fold  and tuck the edges in. Glue in place (or you could sew it, but strong glue works well on oilcloth and getting the foam in a small hole would be a challenge…) and place masking tape over the fabric to hold the glue tightly in place.

booster chair little button diaries 12 booster chair little button diaries 13

Hoorah! Thats a happy little raised up bottom. One thing I would note though, if I was to do it again, is that it would be better with ties on, as it does slip off the chair a bit.

booster chair little button diaries 14b

booster chair little button diaries 17      booster chair little button diaries 15

If you like our blog, we would love you forever if you could take a tiny two seconds to nominate us for the Best Craft Blog at the 2015 BIB awards… click below to vote. Scroll to section 12 and select us. Thank you!

craft bibs 2015

Tia x


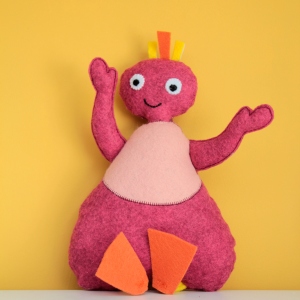
How to make a Twirlywoo Soft Toy

twirlywoo toy tutorial little button diaries

I don’t know if you watch cbeebies. I mean… If you have a 2 year old, like me, you may feel like Mr Tumble is an old family friend and have a very slight crush on Mr Bloom (what!). If you don’t, you have no idea what I’m blathering on about and this post probably isn’t for you!

A new programme, called Twirlywoos, recently entered our lives and both my little ones are obsessed with it. Here they are:

twirlywoos-1

 You can’t buy twirlywoos yet, so I thought I’d make one for them. If you want to do the same, read on – its really easy.

You will need:

  • Felt – Maroon (2 sheets), pink, orange (1/2 sheet), yellow, white, black (scraps)
  • Soft toy stuffing
  • black & white embroidery thread
  • a little glue

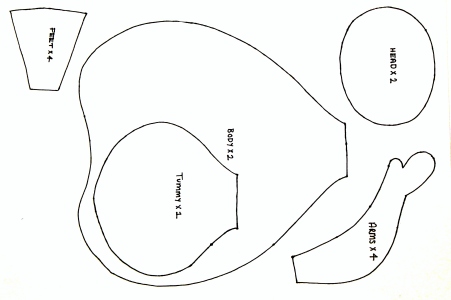
1. Begin by printing and cutting out the template below (scale the image to A4).

twirlywoo tutorial little button diaries 9

2. Pin the template to the felt and cut out.

From the maroon, cut 2 x body, 2 x head and 4 x arm pieces
From the pink cut 2 x tummy pieces
From the orange cut 4 x feet pieces
You will also need to cut 2 white circles and 2 tiny black circles for eyes, a 2 x 14cm strip of yellow that will become the legs and a few little strips of orange and yellow felt for the hair tufts.

twirlywoo tutorial little button diaries 8

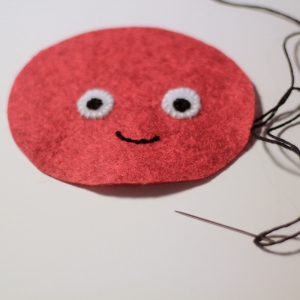
 3. line up the eyes and sew to the face with embroidery thread. Stitch on a little smile too.

twirlywoo tutorial little button diaries 7 twirlywoo tutorial little button diaries 6

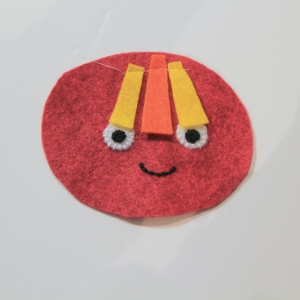
4. Place the hair pieces on top, pointing inwards. Stitch along the top to secure, then sew the head pieces right sides together, with a 5mm seam allowance. Leave a 3cm gap at the bottom to turn. Snip all the way around the edge.

twirlywoo tutorial little button diaries 5 twirlywoo tutorial little button diaries 4

 5. Place the tummy piece on the body and blanket stitch together along the edge of the fabric.

twirlywoo toy tutorial little button diaries 14

6. Sew the arm pieces together with a gap at the end to stuff – as it is felt these will not need to be turned out. Poke some stuffing into the arms then pin, facing in, on the sides of the body piece. Roll the strip of yellow felt lengthways, pin and sew along the length of it to make the legs. Cut this in half and pin to the bottom of the body piece, again facing in.

7. Sew the body pieces together with a 4cm gap at the top. Turn out, then stuff the head and body pieces. Pin the head into the body piece and sew in place – I used a visible stitch to match the blanket stitch (although it wasn’t my neatest!).

twirlywoo tutorial little button diaries 1 twirlywoo tutorial little button diaries 2

Finally, glue the feet pieces together to strengthen them, then stitch the feet onto the bottom of the legs.

twirlywoo tutorial little button diaries 3

I think she looks a little bit like E.T. and she isn’t quite as rotund as the tv version, but she’s a Twirlywoo, right? Lilah was very happy with her new friend. I’ll make another one for Amelie at some point (maybe…).

Tia x

twirly woo 2twirlywoo tutorial little button diaries 12 twirlywoo tutorial little button diaries 11

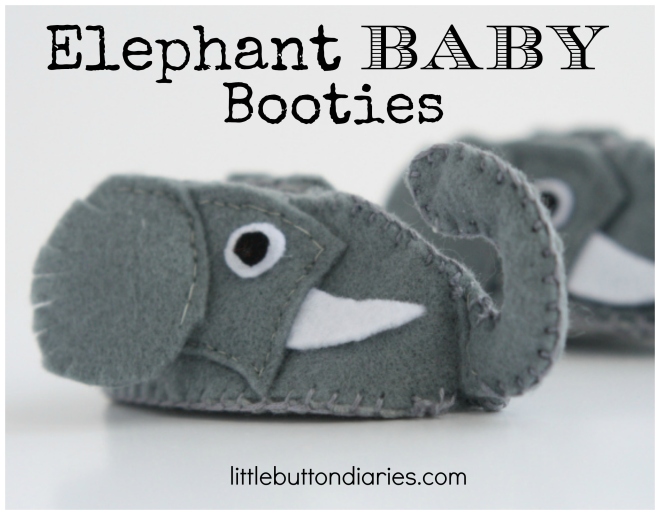
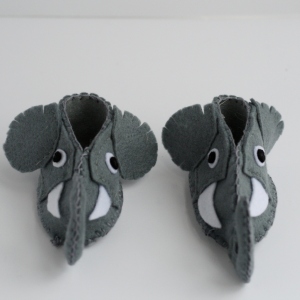
Felt Elephant Baby Booties

elephant baby booties diy

In the run-up to giving birth, some people let their nesting instincts run wild by cleaning the house from top to bottom, over and over. But before the recent arrival of our son, I think I went a little craft crazy – as well as trying to finish off all my existing projects, I decided it would be an excellent time to make something really intricate and completely new to me!

Because I didn’t know what size he’d be, I aimed this pattern at a 3-month-old baby, figuring he could always grow into them.

For this project you will need:

  • 2 sheets dark grey felt
  • 1 sheet light grey
  • Scrap of white felt
  • Scrap of black felt
  • Dark grey embroidery thread
  • Grey cotton
  • Tiny amount of toy stuffing

Elephant baby booties template

1. Begin by cutting out the pattern and fabric, as shown above. For one pair of booties you need to cut the following:

  • Two feet pieces from the dark grey felt
  • Two feet pieces from light grey felt (for the lining)
  • Two foot sole pieces in light grey
  • Four eye pieces in light grey
  • Four ear pieces in light grey
  • Four tusks in white
  • Four trunk pieces in light grey
  • Four larger circles in white for eyes
  • Four smaller circles in black for eyes

felt baby booties diy

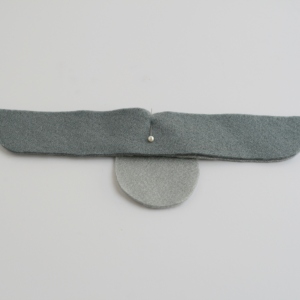
2. Next, pin the two feet pieces to the back of the sole piece, making sure you’re in the centre of the foot piece. You want the light piece to be on the inside of the bootie.

felt baby booties diy felt baby booties diy

3. Using blanket stitch, sew the foot pieces to the sole pieces.

felt baby booties diy

4. Then blanket stitch the top of the feet pieces together around the edge. You also want to stitch up the front leaving enough room to fit a tiny foot in but not too much that it falls off!

felt baby booties diy

  1. Pin and sew the grey eye pieces, tusks and ears in place using cotton thread and backstitch. You want your tusk piece to be tucked under the eye piece so pin it under before sewing. When sewing the ears, only sew along the top of the ear and down the right side so the ears can be pushed out a little and made to flap. Repeat for the other eye, tusk and ear.

felt baby booties diy felt baby booties diy

6. To add a bit more detail, add small snips along the curved edge of the ear.

elephant baby booties diy

  1. Sew the two trunk pieces together using embroidery thread and blanket stitch, leaving a gap at the base of the trunk.

elephant baby booties diy

  1. Using a skewer, push a small amount of toy stuffing up the trunk so it will stand up. Backstitch the trunk onto the front of the booties. Secure the top of the trunk to the top of the bootie with a few stitches.

9. Finally, sew or glue the whites and pupils of the eyes in place.

felt elephant baby booties diy felt elephant baby booties diy


~ Laura xx ~

Nap Time Crafts – Mini Market Shopping Bag

felt shopper

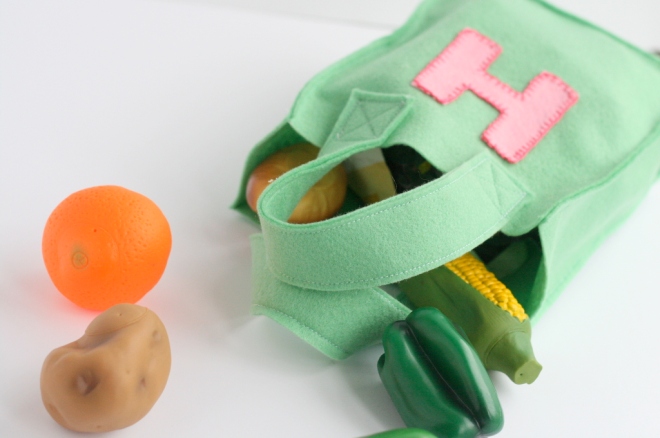
My Little Button is really into shopping at the moment. When she’s at home she likes to fill up little paper bags with objects and then show me what she ‘bought’ at the shops. So I decided to make her a personalised felt shopping bag in which to store all her ‘purchases’. I’m not sure it really counts as a ‘bag for life’ but it’s a step in the right direction, and it will definitely do her until she gets a new obsession!

For this project you will need:

  • 3 sheets of green felt
  • Scrap of contrasting coloured felt
  • Embroidery thread to match contrasting coloured felt
  • Sewing thread

IMG_4093

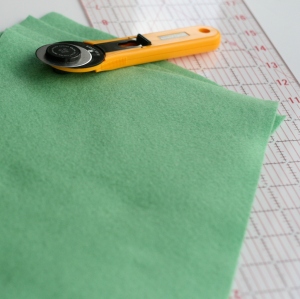
1. Begin by cutting your pieces out of felt. You will need to cut the following:

  • Front and back of bag – cut two rectangles measuring 7 x 9 inches
  • Base of bag – cut one rectangle measuring 3 x 7 inches
  • For the side panels – cut two rectangles measuring 7 x 3 inches
  • For the handles – cut four rectangles measuring 12 x 1 ½ inches

You do not need to incorporate any seam allowance.

felt toy shopping bag tutorial

2. Pin and sew the base piece of felt to the front and back piece (as above).

felt toy shopping bag tutorial

3. Pin the two side panels to the front, back and base of the bag and sew in place.

felt toy shopping bag tutorial

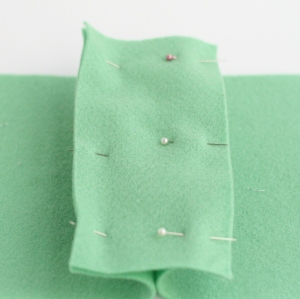
4. For the handles, pin and sew two of your rectangles together. Repeat with the other two rectangles. Pin the handles to the bag. One goes across the front and the other across the back. I positioned mine 1 inch in from the side of the bag and 1.5 inches down from the top. Sew in place by sewing a square and then a cross inside the square to reinforce the handle.

felt toy shopping bag tutorial

5. With your scrap piece of felt, cut your little one’s initial and pin it to the front of the bag. Then sew in place using embroidery thread and a blanket stitch.

IMG_4178

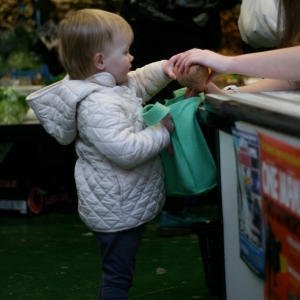
Finally, go shopping! My Little Button loves to take hers to our local fruit and veg market – now she just needs to realise someone needs to pay for her groceries before she sticks them in her bag!

felt shopping bag tutorial

felt toy shopping bag tutorial

felt shopper tutorial felt shopper tutorialfelt shopper tutorial

~ Laura xx ~

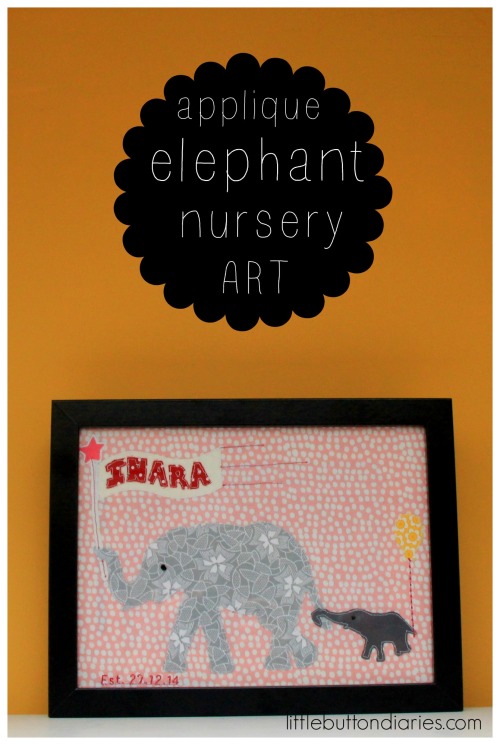
Applique Elephant Nursery Art

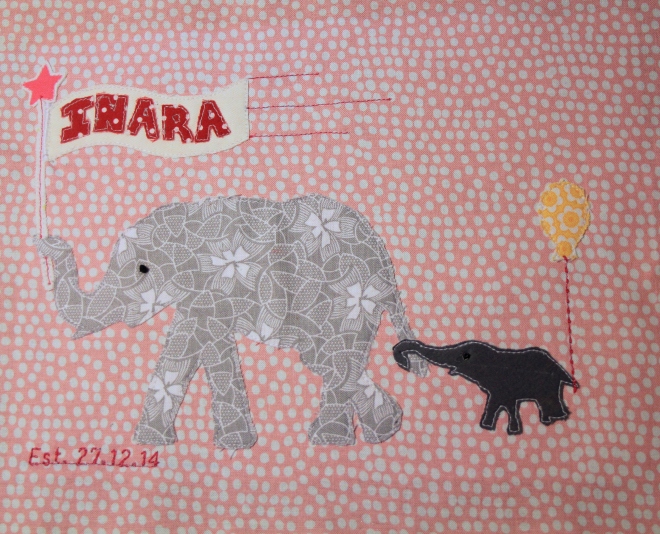
applique elephant nursery artworkJust after Christmas my brother and his wife had a beautiful little girl called Inara. She wasn’t due till February, so she was the picture of teeny tiny pocket sized perfection. I wanted to make her a little picture with her name on it, so I thought I would applique something as I enjoyed making the photo-applique so much. Here’s what I made…

You will need:

  • Printed image for template
  • background fabric (big enough to fit your selected frame)
  • fabric scraps for the applique
  • fusible interfacing

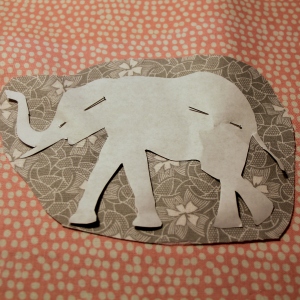
1. Begin by printing an image of an elephant and baby to act as the template for your applique (I used this one). I amended the image a bit so that the mummy could hold a flag with my little neice’s name on it. Draw on the name now then cut out the templates.

nursery applique artwork little button diaries 1 nursery applique artwork little button diaries 2

2. Select fabric for the background and applique pieces (I cut pieces for the elephant, calf, flag, text, flagpole and balloon). Iron on fusible interfacing to strengthen pieces and reduce the amount of fray.

nursery applique artwork little button diaries 3 nursery applique artwork little button diaries 4

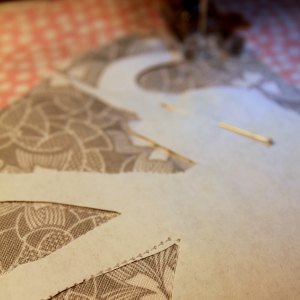
3. Place the first applique fabric pieces onto the backing fabric and pin the template on top. Sew all the way around the template (it doesn’t matter if you sew over the paper a little).

nursery applique artwork little button diaries 5 nursery applique artwork little button diaries 6

4. Remover the paper, then snip around the applique. Sew the calf on in the same way.

nursery applique artwork little button diaries 7 nursery applique artwork little button diaries 8

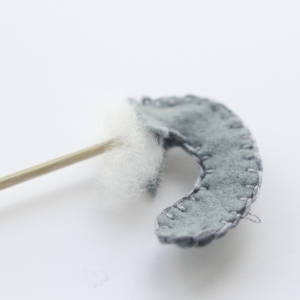
5. For the flag, sew the main piece on as above then place the text fabric over the top and sew over the text. Tear the paper away and snip around the letters.
 nursery applique artwork little button diaries 10 nursery applique artwork little button diaries 11 nursery applique artwork little button diaries 12

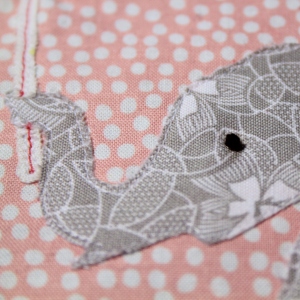
6. Sew on the flagpole and a little balloon (I was quite pleased I added the balloon as the back of the baby elephant does look like he is floating a smidge…!), then hand sew a french knot for each elephant’s eye.

nursery applique artwork little button diaries 16 nursery applique artwork little button diaries 13

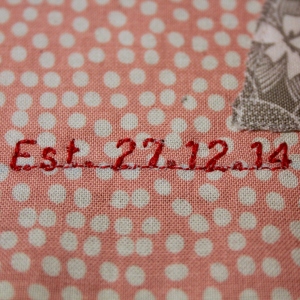
As a last little touch I sewed on my neice’s date of birth onto the bottom of the fabric.  Press and frame!

nursery applique artwork little button diaries 15 nursery applique artwork little button diaries 19b

Tia xx

nursery applique artwork little button diaries 17

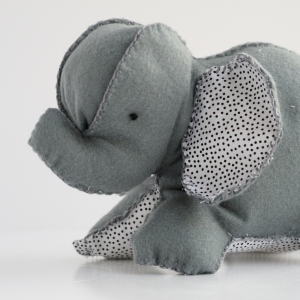
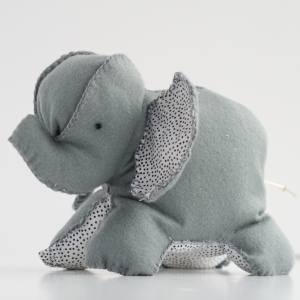
Musical Toy Elephant

elephant


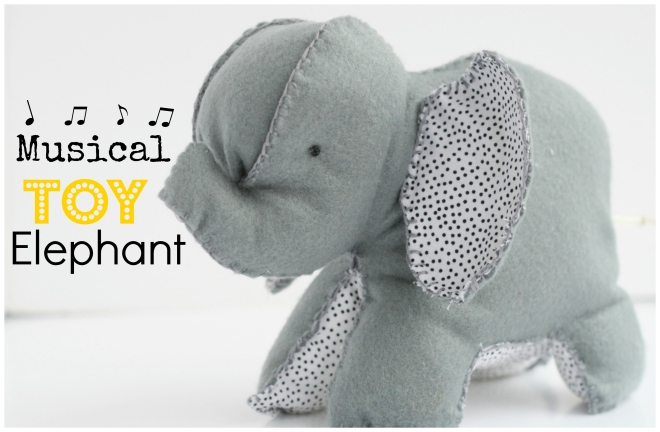
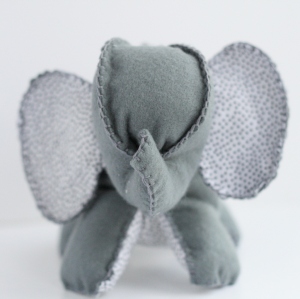
I wanted to make something for the new arrival that might help him sleep (fingers crossed!). When Harper was a baby we had a toy with a musical box inside that seemed to work a treat. That toy became really tatty, so I decided to salvage the musical part of it and make a new one for the baby. This toy could alternatively be turned into a rattle if finding a musical box part is tricky.
For this project you will need:

  • 3 pieces light grey felt
  • Grey embroidery thread
  • Black embroidery thread
  • Material for elephant’s belly (approximately a 30cm square)
  • Toy stuffing
  • Musical box element, rattle or bells

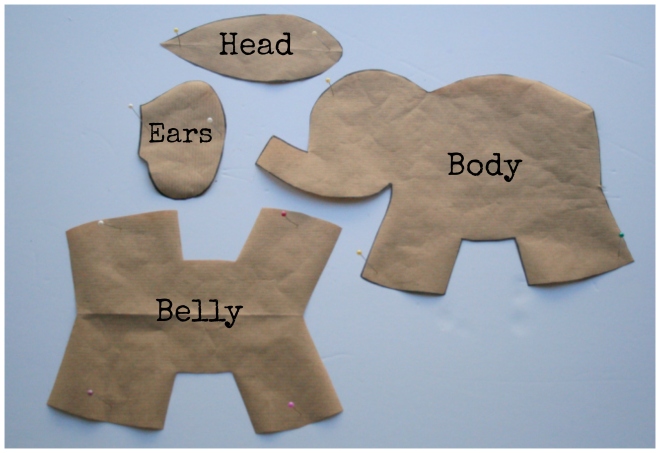
Musical Elephant Toy Template1. Cut out your elephant pieces by pinning your template to the fabric.  You need to cut the following:

  • Two elephant body pieces in light grey felt
  • One head piece in felt
  • One belly piece in your other fabric
  • Four ear pieces – 2 in felt and 2 in your other fabric

 musical elephant toy DIY

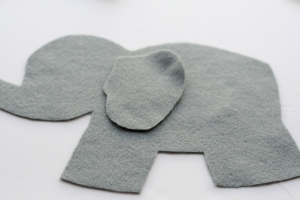
2. Next, pin your body pieces together and blanket stitch from the back around towards the head.

3. Before sewing the head, pin in the head piece and blanket stitch in place. Sew around the trunk back to the neck.

musical elephant toy DIY

4. For the belly, line up and pin your other fabric piece to your legs and attach using blanket stitch. Sew the front two legs and tummy part only at this point so there is a gap to add the toy stuffing.

musical elephant toy DIY

musical elephant toy DIYmusical elephant toy DIY

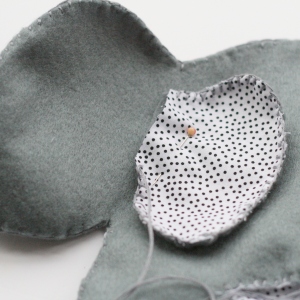
5. Next, pin your ears together. You need one fabric piece on top of one felt piece for each ear. Blanket stitch around the edge of each ear and attach to the head using blanket stitch.

musical elephant toy DIY musical elephant toy DIY

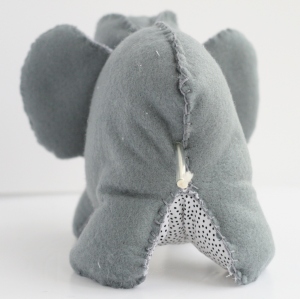
6. Stuff the front of your elephant so he is nice and plump. Then insert your music box and pull the cord through the back of the elephant to become his tail. You want to make sure that you have lots of stuffing around the music box so the elephant is still nice and cuddly.

musical elephant toy DIY  musical elephant toy DIY

7. Once you have stuffed the elephant fully, close up the gap in the legs and belly using blanket stitch again.

musical elephant toy DIY

8. Finally, using black thread, embroider on the eyes using French knots.

musical elephant toy DIY musical elephant toy DIY

~ Laura xx ~

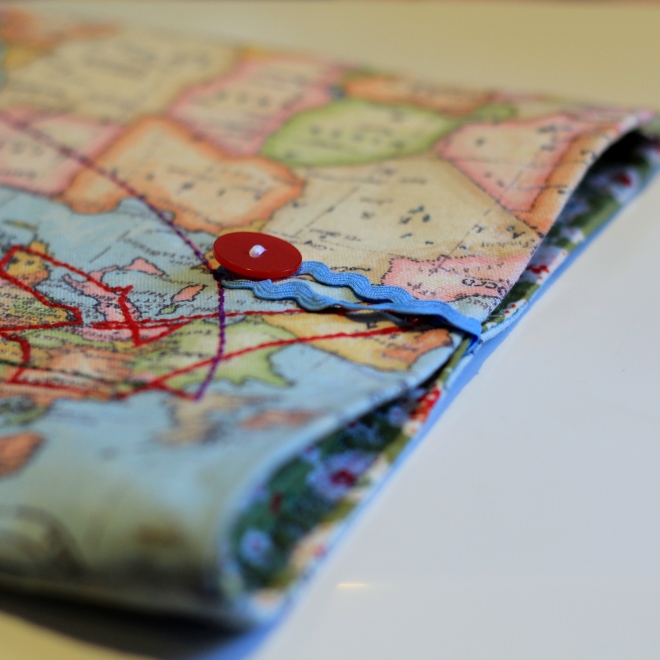
DIY World Map Ipad Case

 world map ipad case tutorial little button diaries craft

 A few years ago, back when I had a life before I had kids, I did a big long adventure across the world with my friend. She asked me a while ago if I could make her a little stitched route map of our trip, so I thought I’d do one and turn it into an ipad case. I loved how easy it was (I know I always say that. But it was really easy – and really speedy too!). Here’s what I did.

You will need:

  • 50 x 21 cm printed map fabric
  • 50 x 21 cm lining fabric
  • 50 x 21 cm thick fusible interfacing
  • 10 cm ricrac/elastic
  • Button

1. If you are marking on a route, sketch out your journey in air erasable ink first, then stitch over either by machine or hand.

diy ipad case little button diaries 1

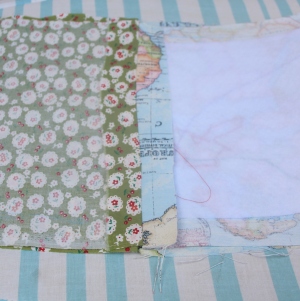
2.  Cut your fabric to size (the measurements above allow for a 1cm seam allowance). Fuse the interfacing onto the reverse of the map fabric.

diy ipad case little button diaries 3 diy ipad case little button diaries 5

3. Pin the map and lining fabric rights sides together. Sew one end of the fabric together with a 1cm seam allowance.

diy ipad case little button diaries 6

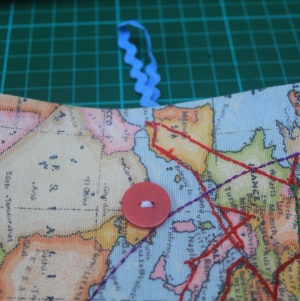
4. Now make the ricrac/elastic into a loop and pin it at the other end of the fabric rectangle, facing in. Put the fabric RST again to sandwich the loop then sew the fabric together along the narrow end, as before.

diy ipad case little button diaries 16 diy ipad case little button diaries 17

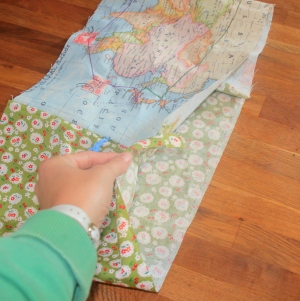
5. Open up the seams and Press then flat to create a large loop of fabric.

diy ipad case little button diaries 18

6. With the fabric inside out, open it up and lay it flat so that one side is map fabric, one side is lining, and the sewn seams are in the centre. Press flat, then pin all the way along the raw edges of the fabric – leaving a 10cm gap along one edge of the lining fabric (for turning). Sew along the edges with a 1cm allowance.

diy ipad case little button diaries 8

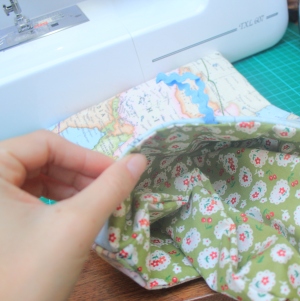
7. Turn the right way out. take the lining fabric and fold the raw edges of the 10cm gap in. Press, pin and slip stitch to seal the gap.

diy ipad case little button diaries 9 diy ipad case little button diaries 11

8. Insert the lining and press the whole thing flat. Mark out where the loop folds to and sew a button in place here.

diy ipad case little button diaries 12 diy ipad case little button diaries 13

diy ipad case little button diaries 20

See, that WAS easy and quick wasn’t it? Let’s make lots!

Tia x

diy ipad case little button diaries 22


Little Bear Hand Warmers: Our Latest Hobbycraft Post

bear handwarmer tutorial from little button diaries

Look at this cute little bear! Don’t you just want to… pop him in your pocket? Our latest Hobbycraft Post shows you how to make him – stitch him up and stuff him with rice. Easy Peasy.

For the full tutorial, hop on over to Hobbycraft’s Blog.

Tia & Laura x


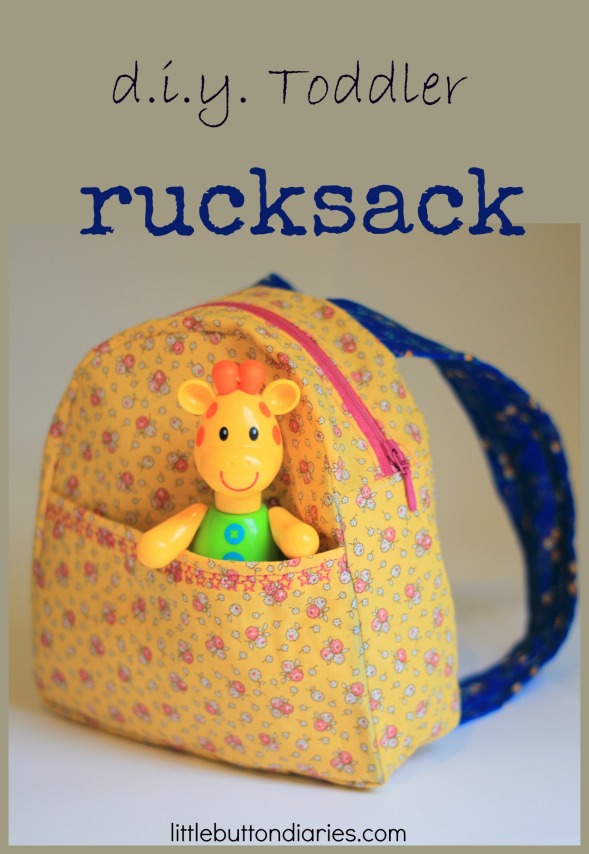
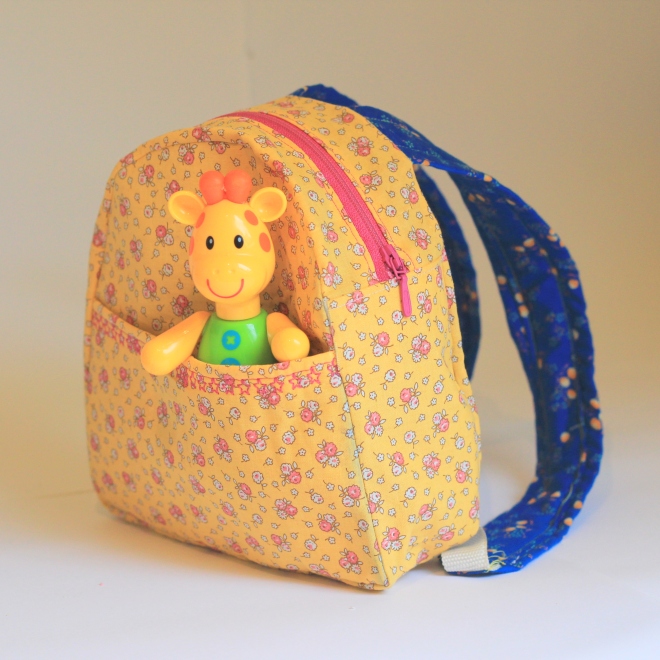
A little girl’s rucksack

toddler rucksack tutorial little button diaries

My little girl LOVES bags. And lip balm. And anything on the planet that is pink. How has this happened? I didn’t do it! We made some adorable strawberry bags in the spring and she loves hers, but she needs more space to stuff her “treasure” in, so I decided to make her a little rucksack that she can carry around.

I used 2 fat quarters of contrasting fabric and some thick fusible interfacing to make the bag. I wasn’t following a pattern so this is definitely not the “official” way to make a rucksack but I have outlined the process I took below. I guessed my way along but it did the job!

~ How its Made ~

1. I began by cutting 4 domes of fabric, 2 from lining and two from outer. I attached interfacing to the outer piece and then adhered the two together with bondaweb.

toddler rucksack little button diaries 8

2. To make a pocket, I sewed two rectangles of the contrasting fabrics together, pressed and sewed a fancy stitch along the top. This was sewn onto one of the dome pieces.

toddler rucksack little button diaries 6 toddler rucksack little button diaries 18

3.  I sewed a zip onto two strips of fabric, pressed and top stitched.

toddler rucksack little button diaries 13

4.  I sewed on strips of outer fabric (Strengthened with interfacing) onto each end of the zip piece to create one long strip that was equal to the circumference of the bag. I flipped this round and sewed equal sized lining strips on the other side of the zip to neaten the interior.

toddler rucksack little button diaries 14 toddler rucksack little button diaries 17

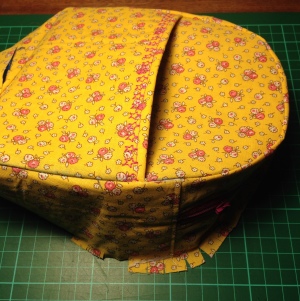
5. This strip was then pinned all along the edge of the pocketed side of the bag, right sides together. I sewed the two ends of the strip together.

toddler rucksack little button diaries 22 toddler rucksack little button diaries 23

 6. For the straps, I made two strips from lining fabric, strengthened with fusible fleece, and attached some canvas strap to each end. I pinned these onto the reverse of the bag.

toddler rucksack little button diaries 39 toddler rucksack little button diaries 41

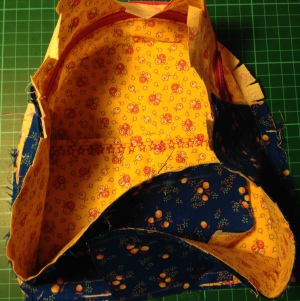
7. Tucking and pinning the straps out of the way in the middle, I then sewed the back of the bag on in the same way as the front (NB – it is important to open the zip before starting this in order to turn the bag the right way out!)

 toddler rucksack little button diaries 43

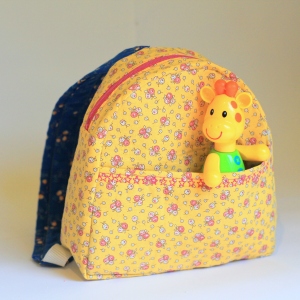
Then I turned the right way out voila – it actually looks like a rucksack!!

toddler rucksack little button diaries 47

We went straight to the park with the new bag and it promptly got filled (I mean, totally FILLED) with twigs and acorns and leaves and the odd lollipop stick. I sat and had a cup of tea whilst all this took place so already the bag is a big win!

Tia xx

 toddler rucksack little button diaries 26 toddler rucksack little button diaries 27toddler rucksack little button diaries 44

toddler rucksack little button diaries 45 toddler rucksack little button diaries 46