Nap time crafts: Polymer Princesses

polymer princess little button diaries 13

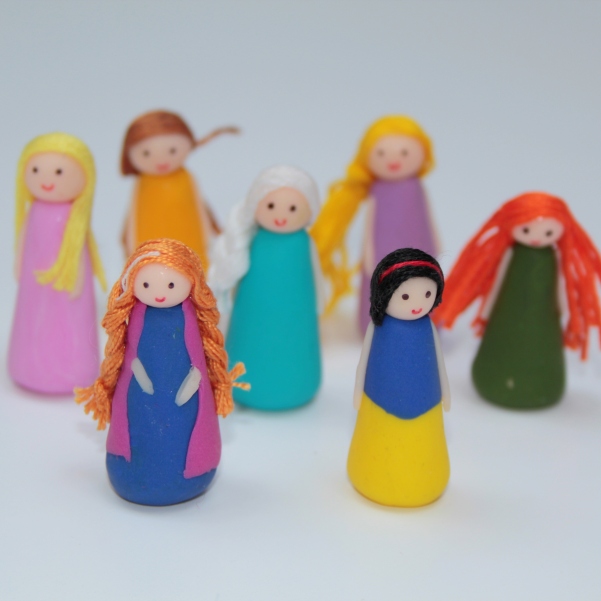
For another project, I’ve recently been making a lot of very cute and girly things that I haven’t been able to give to Amelie. It’s made me feel so bad, she comes into my craft room (I say craft room, I’ve basically stolen the conservatory and renamed it. Anyone else find that craft stuff seems to just breed?!), she gets all excited and I have to quickly remove her from the area before she creates damage. So I decided to make her some little princesses from fimo. I gave her some lumps too (small ones, this stuff is expensive!) and she made some grotesque looking warped princesses too.

These are really easy to make, and take about 15 minutes per doll. These ones are only tiny, about 5cm high, but you could make them any size.

You will Need (Per Princess):

  • Polymer clay (I use fimo soft) – about 1cm lump of skin tone and 2cm in your chosen dress colour
  • Super Glue
  • Embroidery thread for hair
  • black and red permanent fine liner

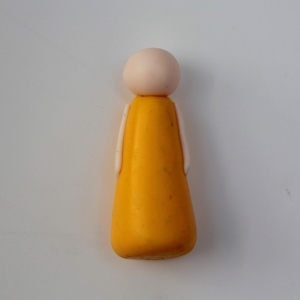
1. Thoroughly clean your hands and dry them on something non-fluffy. Odd as that might sound, this stuff picks up dust and fluff and quickly looks manky!! Begin by rolling the lumps you need. From pink, roll a pea sized ball for the head and two thin sausages, about 2cm long, for the arms. Then take the body lump – here I’m making Belle (obviously…) so I’ve used dark yellow. Roll the lump into a ball, then a sausage, then roll one end so that it is slightly narrower at the top. Press the bottom on the work surface to flatten and make it stand.

polymer princess little button diaries 1

2. Press the arms onto the side of the body, and the head on the top. You can learn from my mistakes here as I didn’t secure the head enough (it popped off on first play and had to be glued back), so really make sure the pieces are adhered to one another, you can use a cocktail stick or a knife to blend the edges together.

polymer princess little button diaries 2

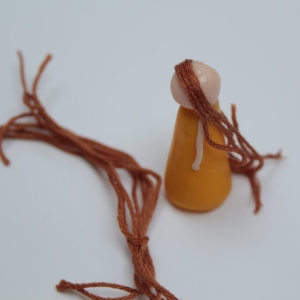
3. Place the princess(es) on a lined baking tray and bake in the oven according the manufacturers guidelines. Whilst they cook, prepare the hair. Create a loop of embroidery thread around your fingers, about 10cm long, and wrap the thread around 6 times. Cut through the loops to create strands. Once the dolls are out of the oven and cooled, place some glue onto the back of the head and stick the strands on one by one, starting from the front and working your way down till there are no more bald bits!

polymer princess little button diaries 3 polymer princess little button diaries 4

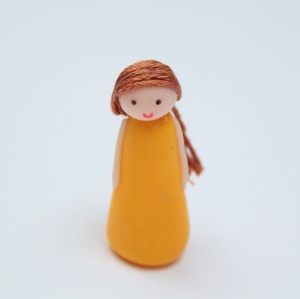
4. Tie or plait the hair however you like, then take a fine permanent pen and draw on a smiley little face.

polymer princess little button diaries 5 polymer princess little button diaries 6

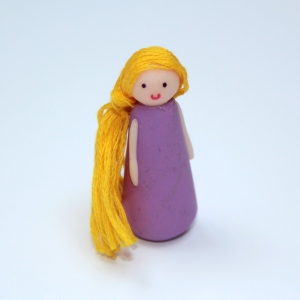
Here are the some of other dolls I made:

polymer princess little button diaries 10 polymer princess little button diaries 8polymer princess little button diaries 9 polymer princess little button diaries 12

Can you work out who they are?! I liked the Anna princess best – I just added a cape and rolled it in place, put a bit of white thread in her hair and plaited it. Snow White’s body was made from two lumps of clay rolled together, with red thread for the hairband.

polymer princess little button diaries 11

Tia xx

PS. If you like our blog, we would love you forever if you could take a tiny two seconds to nominate us for the Best Craft Blog at the 2015 BIB awards… click below on the picture to vote. Scroll to section 12 on the form and select us. Thank you!

craft bibs 2015

x

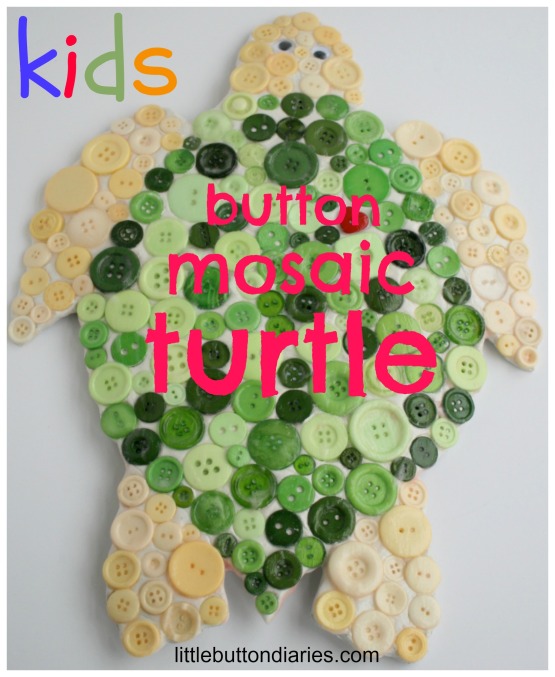
Kids Project: Button Mosaic Turtle

button mosaic turtle little button diaries

This little fella would be very happily hang in a little one’s bedroom. He’s super easy to make with the help of some air dry clay and a handful of coloured buttons. Hop over to Hobbycraft to see our blog post on how to make him. Complete with template and video tutorial!

HC Mosaic Turtle 7 HC Mosaic Turtle 11

Tia & laura x

Air Dry Clay Toy Biscuits

clay biscuits 13

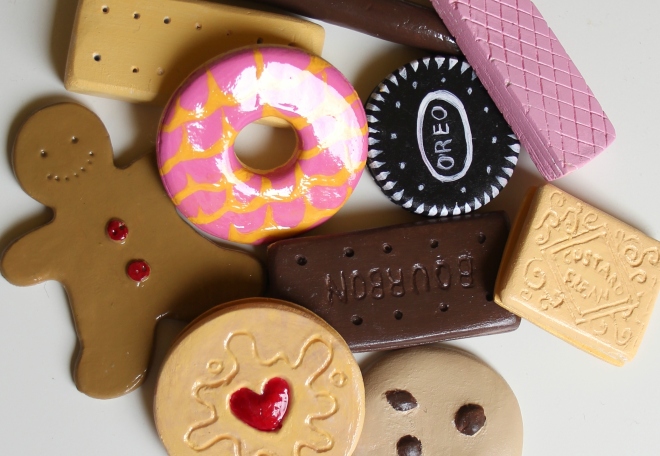
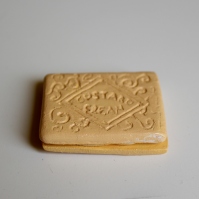
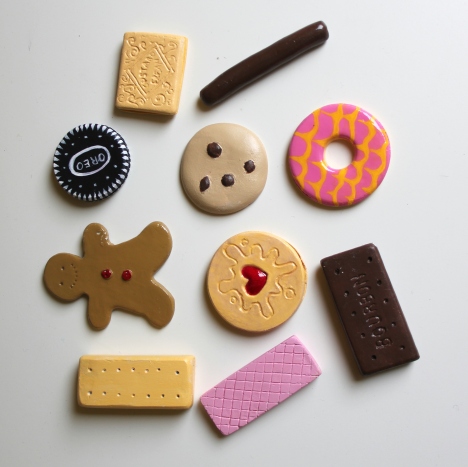
Amelie loves popping foods into her toy cooker and ‘baking’ them, so I thought I’d make her some biscuits from air dry clay. These cute little yummies turned out really well (apart from the Oreo… that one was a bit dodgy) and I think they were my favourite thing I’ve made for her so far! Except that I wanted to eat biscuits the entire time I was making them. Read on to learn how to make your own.

You will need:
Air dry clay (I use DAS)
Rolling pin
Acrylic paint
Toothpick
Knife
Cookie cutter
Fine sandpaper
Superglue
Varnish (I use Triple Thick)

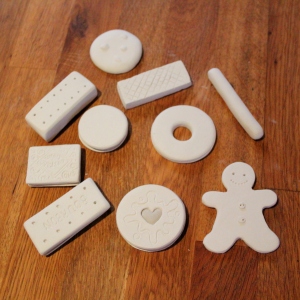
1) Pick some images of your favourite biscuits to copy. Roll out the clay to the thickness of each biscuit. I prefer to do this on a taped down piece of cling film – this makes it easy to remove the clay from the board without having to peel/bend it. For the round biscuits use a cookie cutter or small jar lid to cut your shapes. For sandwich biscuits, make the two outer pieces but hold on the filling for now. Square biscuits can be cut easily with a knife. The edges don’t need to be too smooth at this stage.

clay biscuits 1

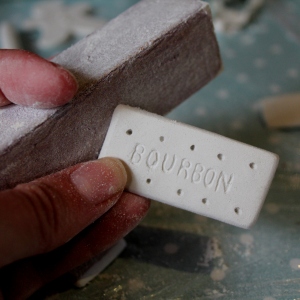
2) For text, patterns and holes, take a toothpick and carefully score into your biscuit.

clay biscuits 2

3) leave the clay to dry, then sandpaper the biscuits to create a smooth finish. You can also go over any markings with a toothpick again to create a smoother finish.

clay biscuits 3

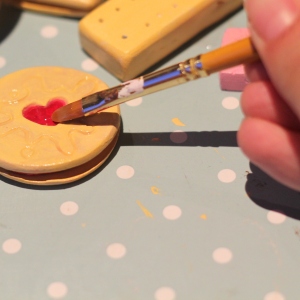
4) fun bit! To make the filling for your biscuits, take balls of fresh clay, squash a little and then press between the two dry pieces. This works especially well on the jammy dodger as it puffs out a bit in the hole. Just like in real life… yuuuuum. Once its squashed to the right size, take it out and, once dry, glue back in place.

clay biscuits 15 clay biscuits 16

5) paint your biscuits, leave to dry and then apply a coat of varnish to the ones that need shine.

clay biscuits 4 clay biscuits 5

6) Go and buy/eat a packet of jammy dodgers. Optional. I had a serious craving by this stage.

clay biscuits 8 clay biscuits 10 clay biscuits 9clay biscuits 11 clay biscuits 6

Tia x

p.s. If you like this clay post why not try the following – click on the image to take you to the tutorial.

mobile 5  clay ring 1

Make Your Own Cloud Clay Mobile

mobile 5
mobile 6

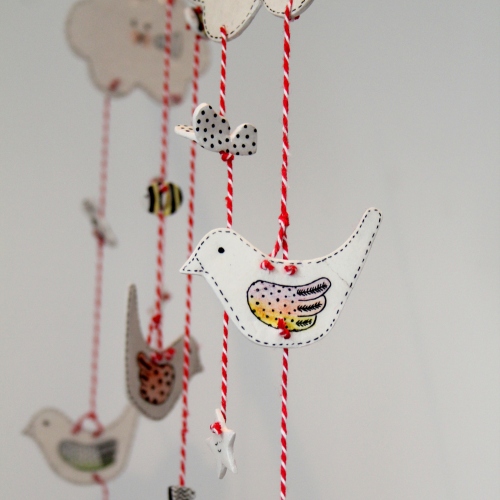
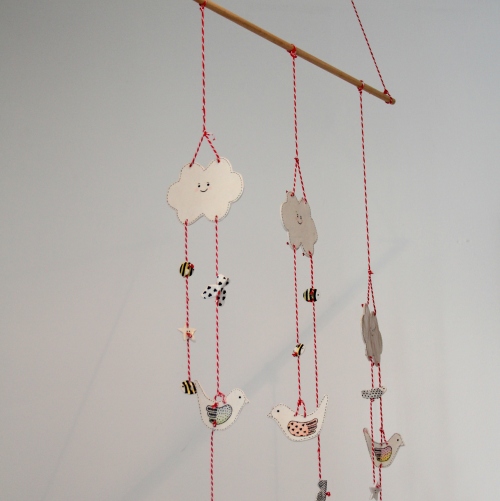
Inspired by this tutorial on www.creaturecomfortsblog.com (which in itself is a really adorable blog), and given my current fetish with all things made of clay, I decided to have a go at making a little air-dry clay mobile of my own for my little one’s bedroom. I recently put some sticky stars on her ceiling and she loves to stare at them from her cot (“oooooh, DAR!”) so I thought I could do with a bit more ceiling decoration. So here’s how I did it…

Materials
Air dry clay (I use Das)
1 wooden dowel measuring about 40cm
Fine sandpaper
Pen & Crayons
Varnish
Bakers twine

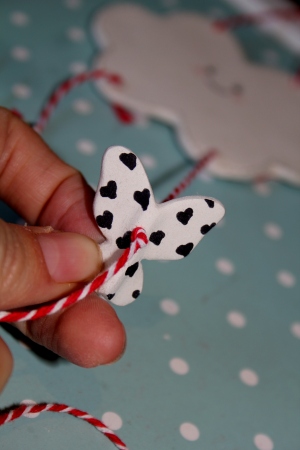
1) Before rolling out the clay, make the templates for the basic shapes for your mobile on paper and cut out. I made clouds, birds, butterflies and bees.

2) Roll the clay out to about 5mm thickness, cut around the templates and poke holes with a cocktail stick for where they will hang (I actually messed up here by only putting holes at the top of each shape rather than the bottom as well – so I had to drill them in once dry. Stuuuuuuupid…). Set the pieces aside to dry overnight.

3) Once dry, take some find sandpaper and gently sand down the clay all over to create a smooth finish. This is much easier than smoothing whilst the clay is still wet (it took me a long time to work this out!)

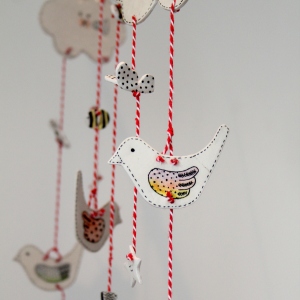
4) Decorate the clay using water colour pencils and ink pen on both sides.

mobile 1

mobile 3

5) Varnish each piece, unless you want a matte finish of course. Varnish does give greater strength and durability. Thread the pieces together with bakers twine.

mobile 2

6) Attach the twine to the dowel and hang the mobile in place.

mobile 5 mobile 4 mobile 8

All finished! So now Amelie says “dird” (bird) as well as “dar” (we’re working on “cloud”…)

Tia xx

p.s. If you like air dry clay check out this post on making your own clay ring and this one on making a clay house candle holder

If you like our crafts then please vote for us for Best Craft Blog for the MAD Awards. Click on the picture below to nominate us. Thank you!

mad blog awards

DIY Clay Ring

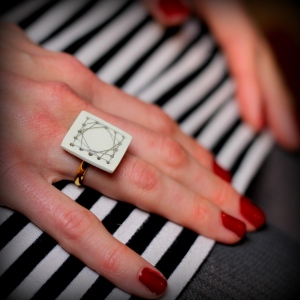
As I mentioned in a post a few weeks ago about a DIY crayon ring, I’ve been wanting to wanting to make some air-dry clay jewellery for ages now. So I decided to try making something that combined clay and thread, using the thread to stitch a pattern on the ring. I am actually very happy with how it turned out and it was very easy too! Read on for how to make your own…

clay ring 1You will need:
– Air Dry Clay (I used DAS in white)
– Cocktail stick
– Fine sandpaper/emery
– Varnish
– Needle & thread
– Superglue
– Ring base

1. Begin by rolling out your clay to about 3mm thickness, and cut out a 1 inch square with a knife. I used a ruler for this to ensure accuracy – you could use a template too.

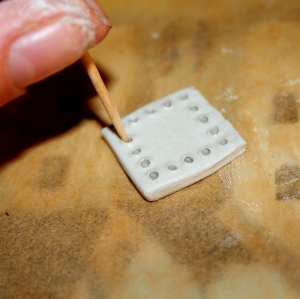
2. With a cocktail stick poke holes along the edge of the square – wiggling the stick to make sure the hole is big enough to fit a needle through. Each side should have 5 holes. Turn the square over to even out the holes from the other side.

clay ring 2

3. Allow the clay to dry out completely before sanding it down with sandpaper to ensure the surface is completely smooth. Varnish the square and leave to dry – make sure the holes do not get blocked by the varnish (you can re-poke with your cocktail stick!)

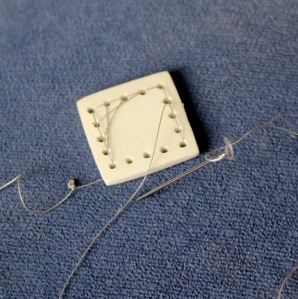
5. Take a needle and select your preferred thread colour then simply thread the clay in whichever pattern you chose, knotting the end once complete and painting a layer of varnish onto the back to give the thread extra stability.

clay ring 3 clay ring 1

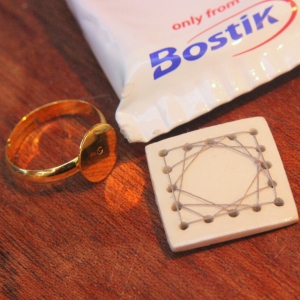
 6. Glue the square of clay into place onto your ring base.

clay ring

Hooray finished!

  ring 3 ring 2

Some Little Fat Robin Christmas Decorations

I’m having a bit of an air-dry clay obsession at the moment, and this week I made some little Christmas decorations for my tree. They didn’t come out exactly as I planned them in my head… but I thought I’d share anyway as the quirky homemade decorations are always nicer than the bought ones. Right?!

These are little Christmas clay robins. They are NOT, as my partner George enquired, ‘upside down Christmas Puddings…?’ Hmph.

robins 1

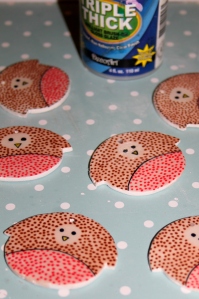
They are made from air dry clay, cut to size from a paper template and then sanded down when dry with a foam nail file.

decorations

I used felt tip pens to add colour and then glazed with good varnish (Mod Podge works well but I use Triple Thick).

decorations 2

decorations 3    decorations 4

 Bless their little podgy faces. Maybe I should try Christmas puddings next year…

robins 2

Tia xx

I Built a Little House

clay tea light tutorialAs the shops constantly remind us, Christmas is just round the corner! Jingaling! Okay so I DO love getting that Christmassy feeling… but I don’t like getting it in October, so that by December I’m a bit bored of it. But maybe that’s just me!

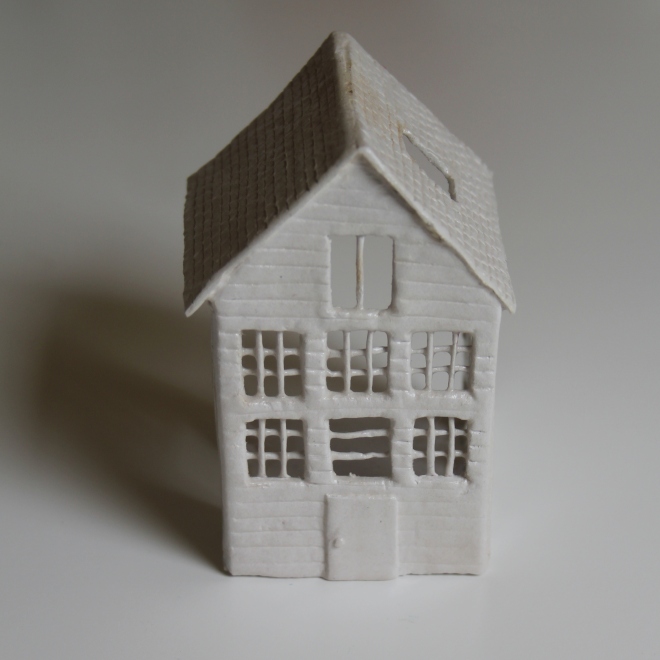
On the plus side, the good thing is that festive reminders give us crafty and organised folk (I’m not the latter, although I try to be every year!) a chance to get creative on our Christmas presents. This year, I thought I might dig out the air dry clay and make some little pottery gifts. I thought a candle holder would be nice so I decided to make one shaped like a little house – I saw one in Butlers a few weeks back and it looked like it could be quite simple to emulate. It only few hours to make, with some overnight drying time. Here’s the finish (prototype!) house:

clay house 4

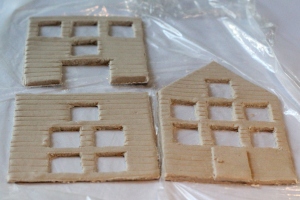
To make, firstly I drew the house on paper, with all sides measures to create a template. I cut that out and placed it on some rolled out clay and then cut around. For the windows I cut the bare holes first and then added rolled out thin strips of clay on the insides of the walls once the had dried. The good thing about air dry clay is that you can sand it down with an emery board when it is set, so rough edges (e.g in the windows) are easy to remove.

clay house 1

clay house 2

I then used super glue to stick my house together. Clay would give a better finish but it would be very tricky to get all the sides to hold together. I then coated the glued areas with some watered down clay (aka slip) and sanded down again once dry.

The final stage was to coat the lot with a strong clay varnish. This makes the house shine as well as giving strength.

clay house 3

Once I had my house and was happy about it, I thought it would be really nice to make a version modelled on my mother in law’s house. We’ll see how that one comes out!

Tia